Fall. I just love fall. So today in honor of the season we are taking a look at the Autumn Shelley by Felicity Patterns. Be ready for photo overload as we just had a great time on the photoshoot with this one. Baby girl just loves Fall, well really the leaves, too!

Now this cute little pattern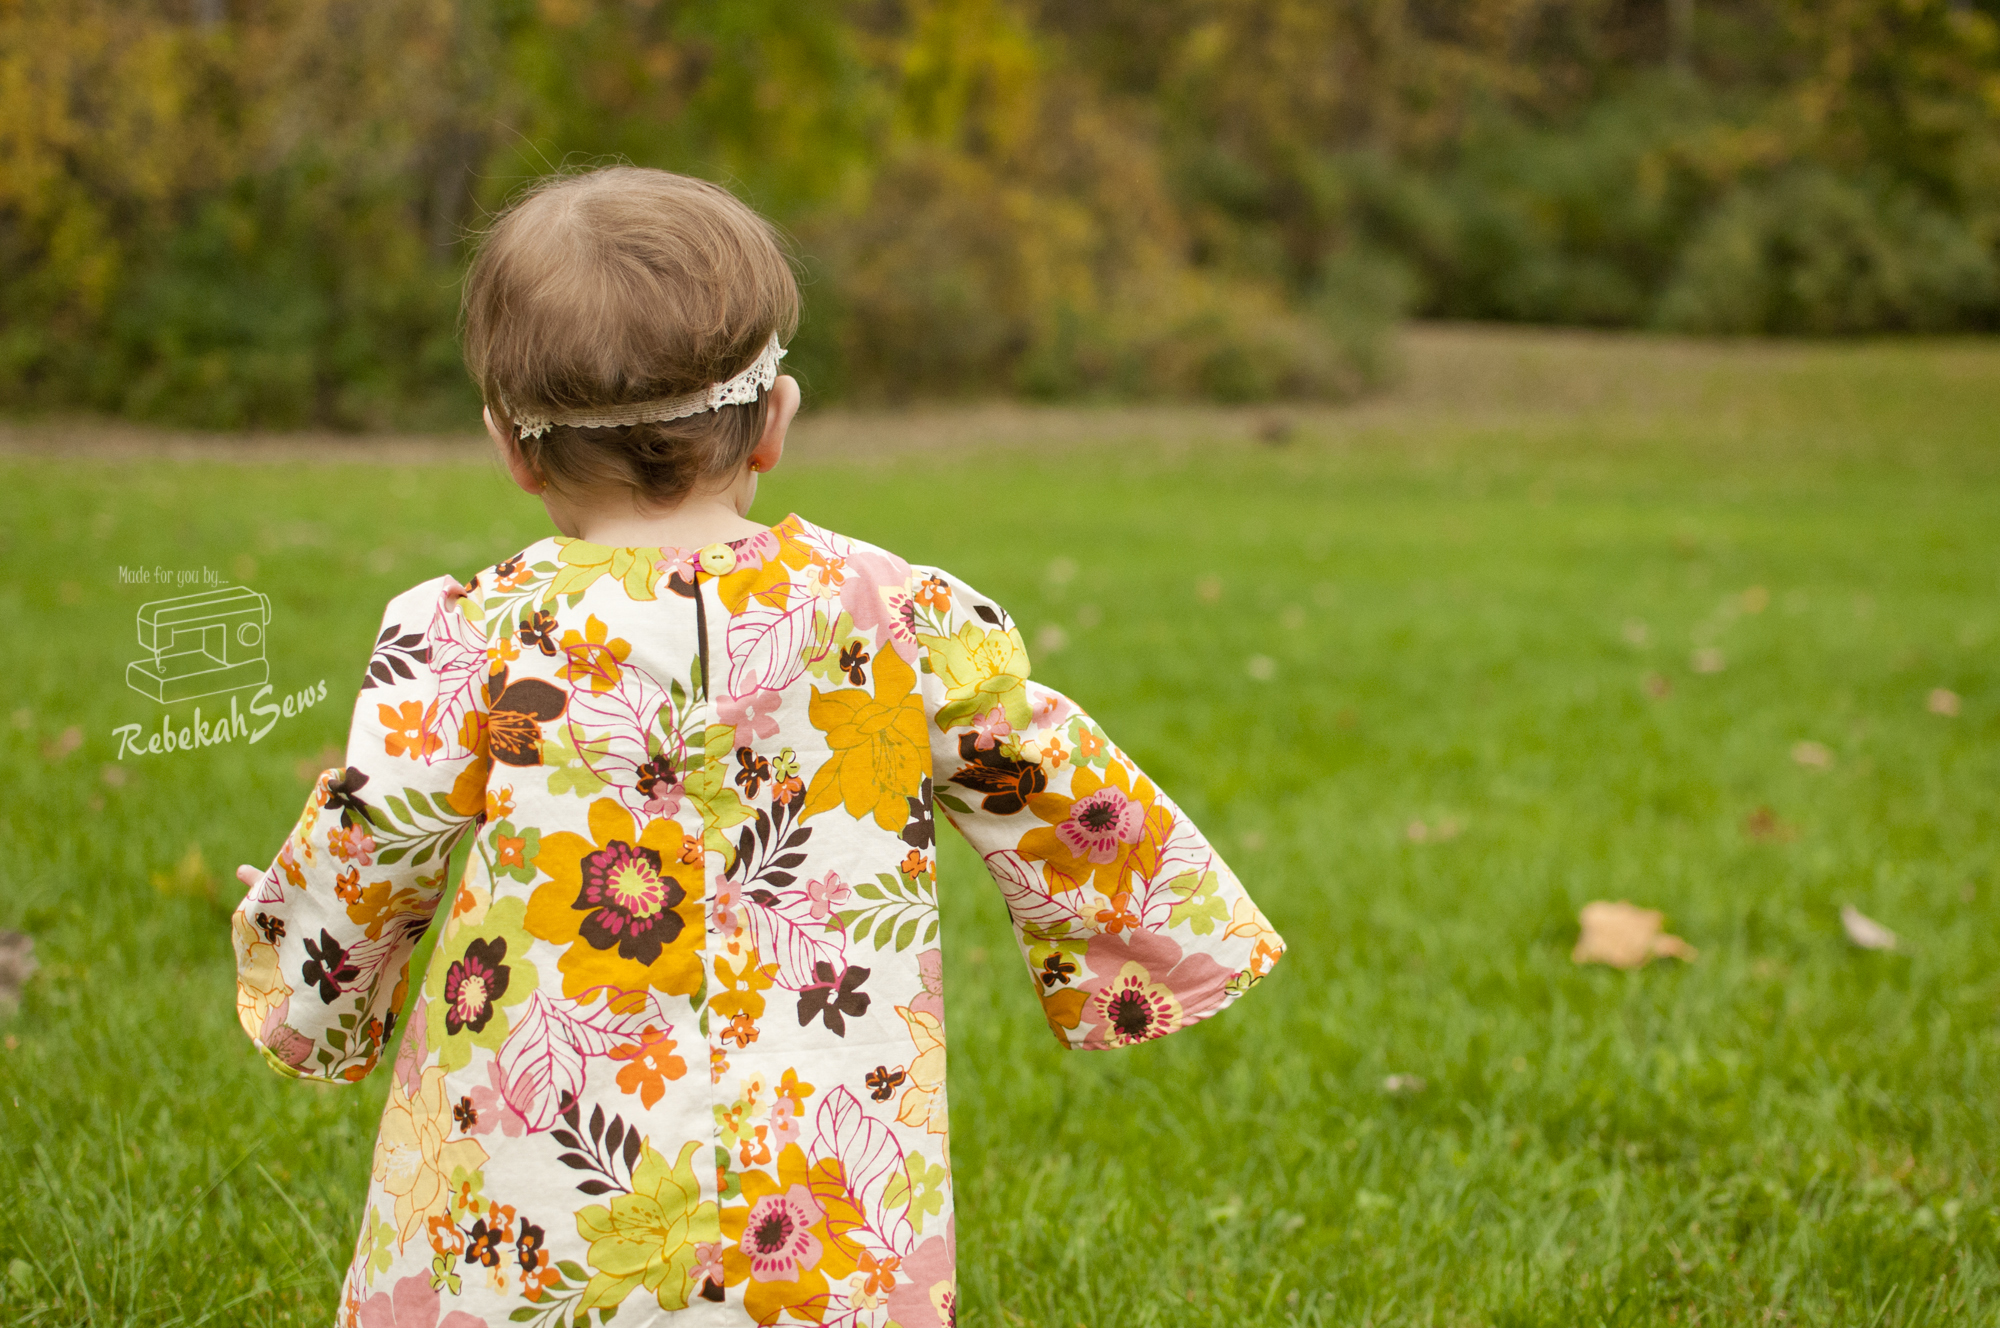 gives a classy yet vintage feel with many options. It comes in sizes 1-8yrs and the sizing is spot on! The options included are button closure (no button hole though!),
 zipper closure, long sleeve, short sleeve, plain or decorative stitching pleats, and dress or shirt length. The pattern also goes through how to add lace to the neckline and long sleeves for an even fancier feel. The level of sewing on this pattern is advertised as intermediate and I think that is very true. With the pleating, edge stitching, facings and other features, you do need to have a good grasp on sewing prior to completing this pattern.

In order to go through each option the pattern includes 3 tutorials. 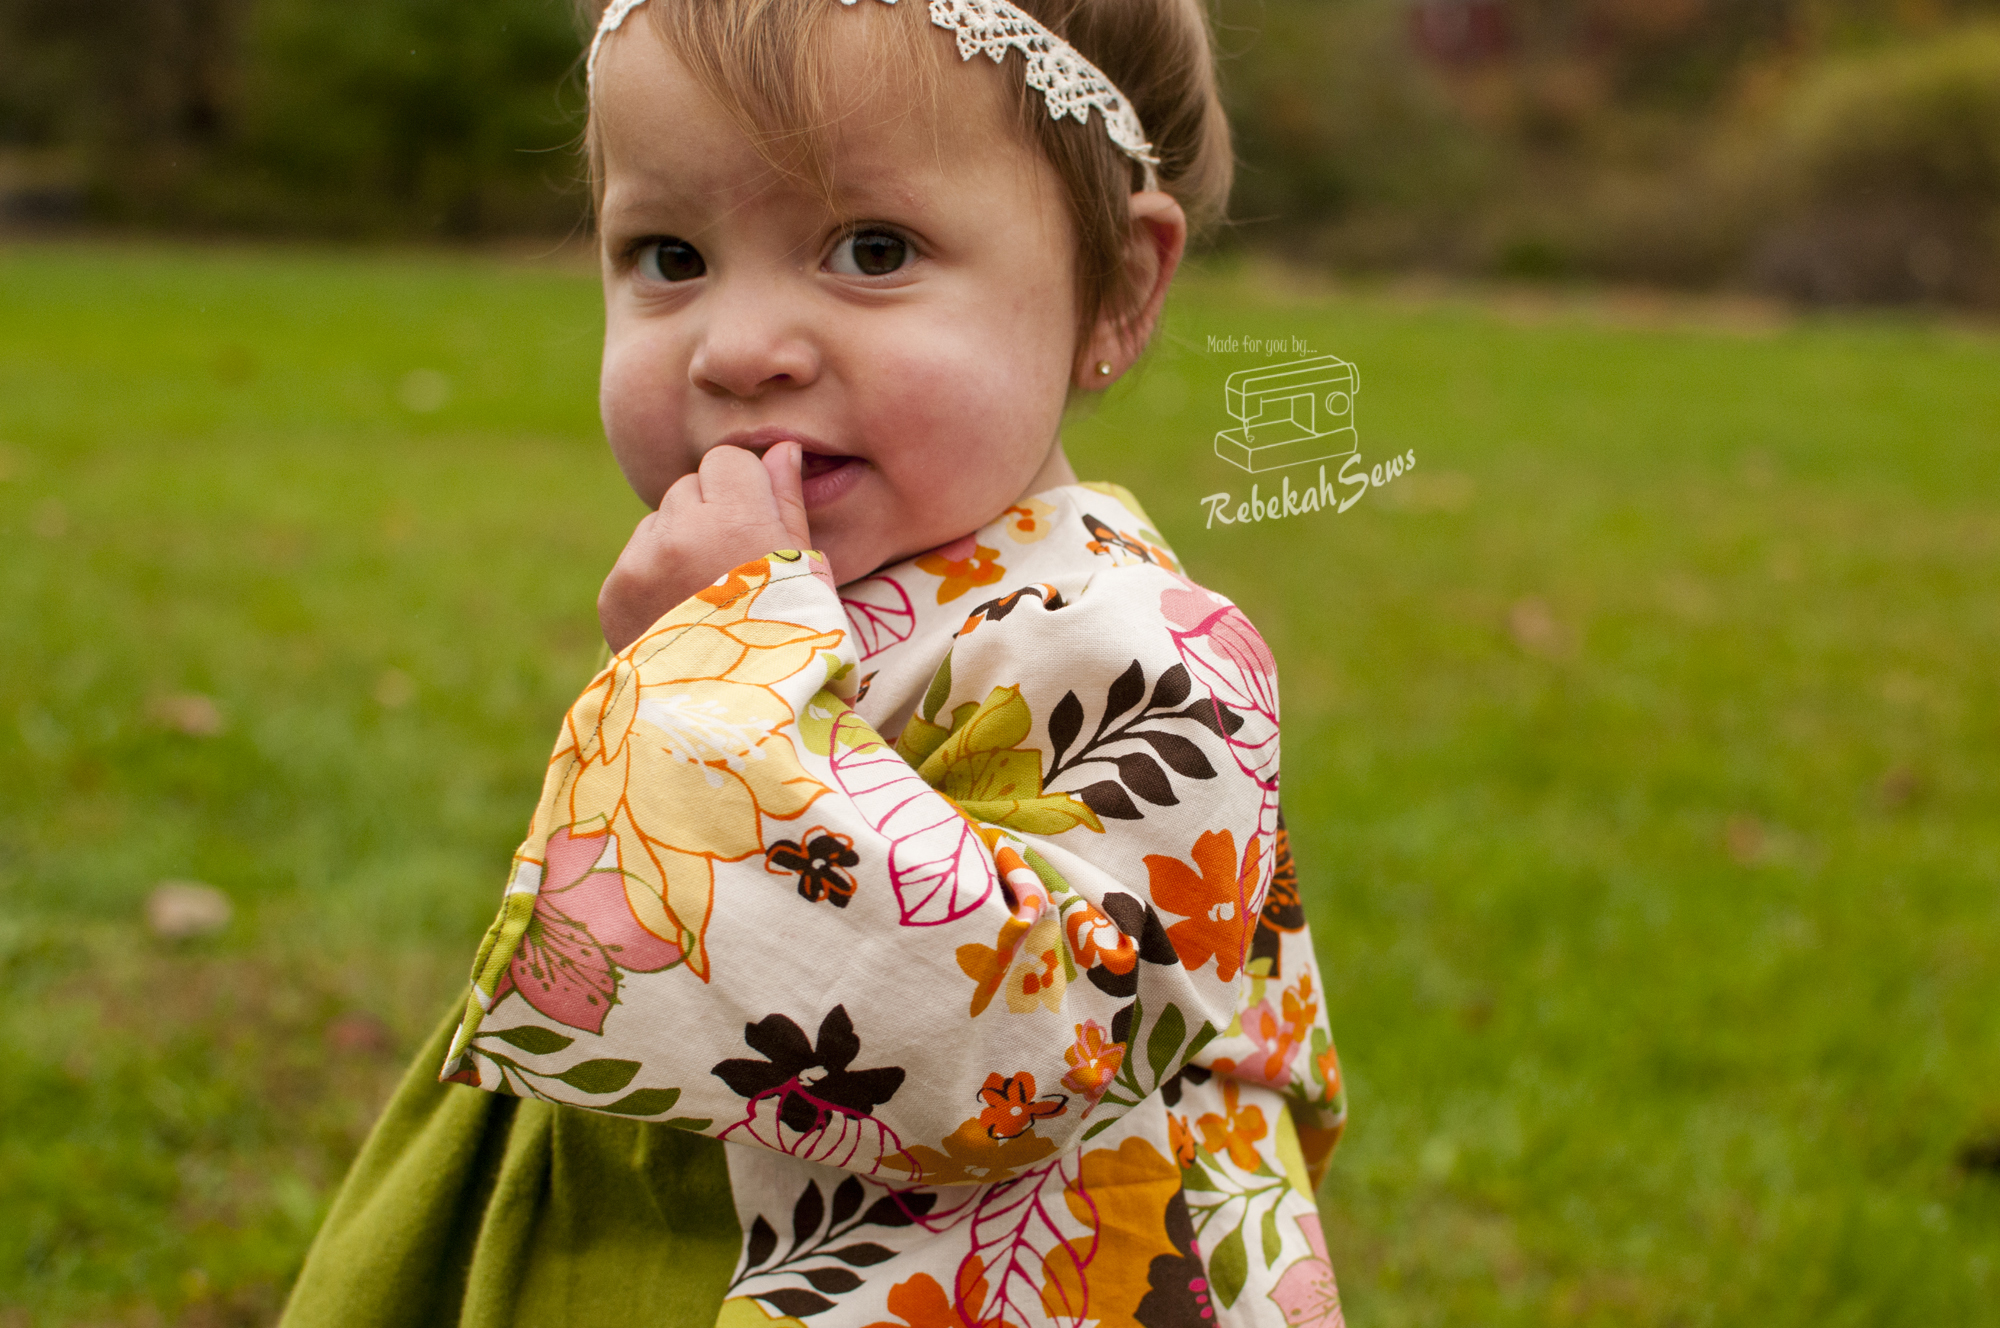 This is definitely one pattern you should read before you start sewing so you know what to expect. You may need to jump around the different tutorials in order to get the instructions on the options you chose. Yes it was a bit inconvenient, but there were many options to cover.
 The way the pattern is written is a bit different than most patterns I have done. Some very important info like which seams are what seam allowance (pay special attention to these as they aren’t all the same), printing instructions, and sizing chart are all at the end of the tutorials rather than in the front.
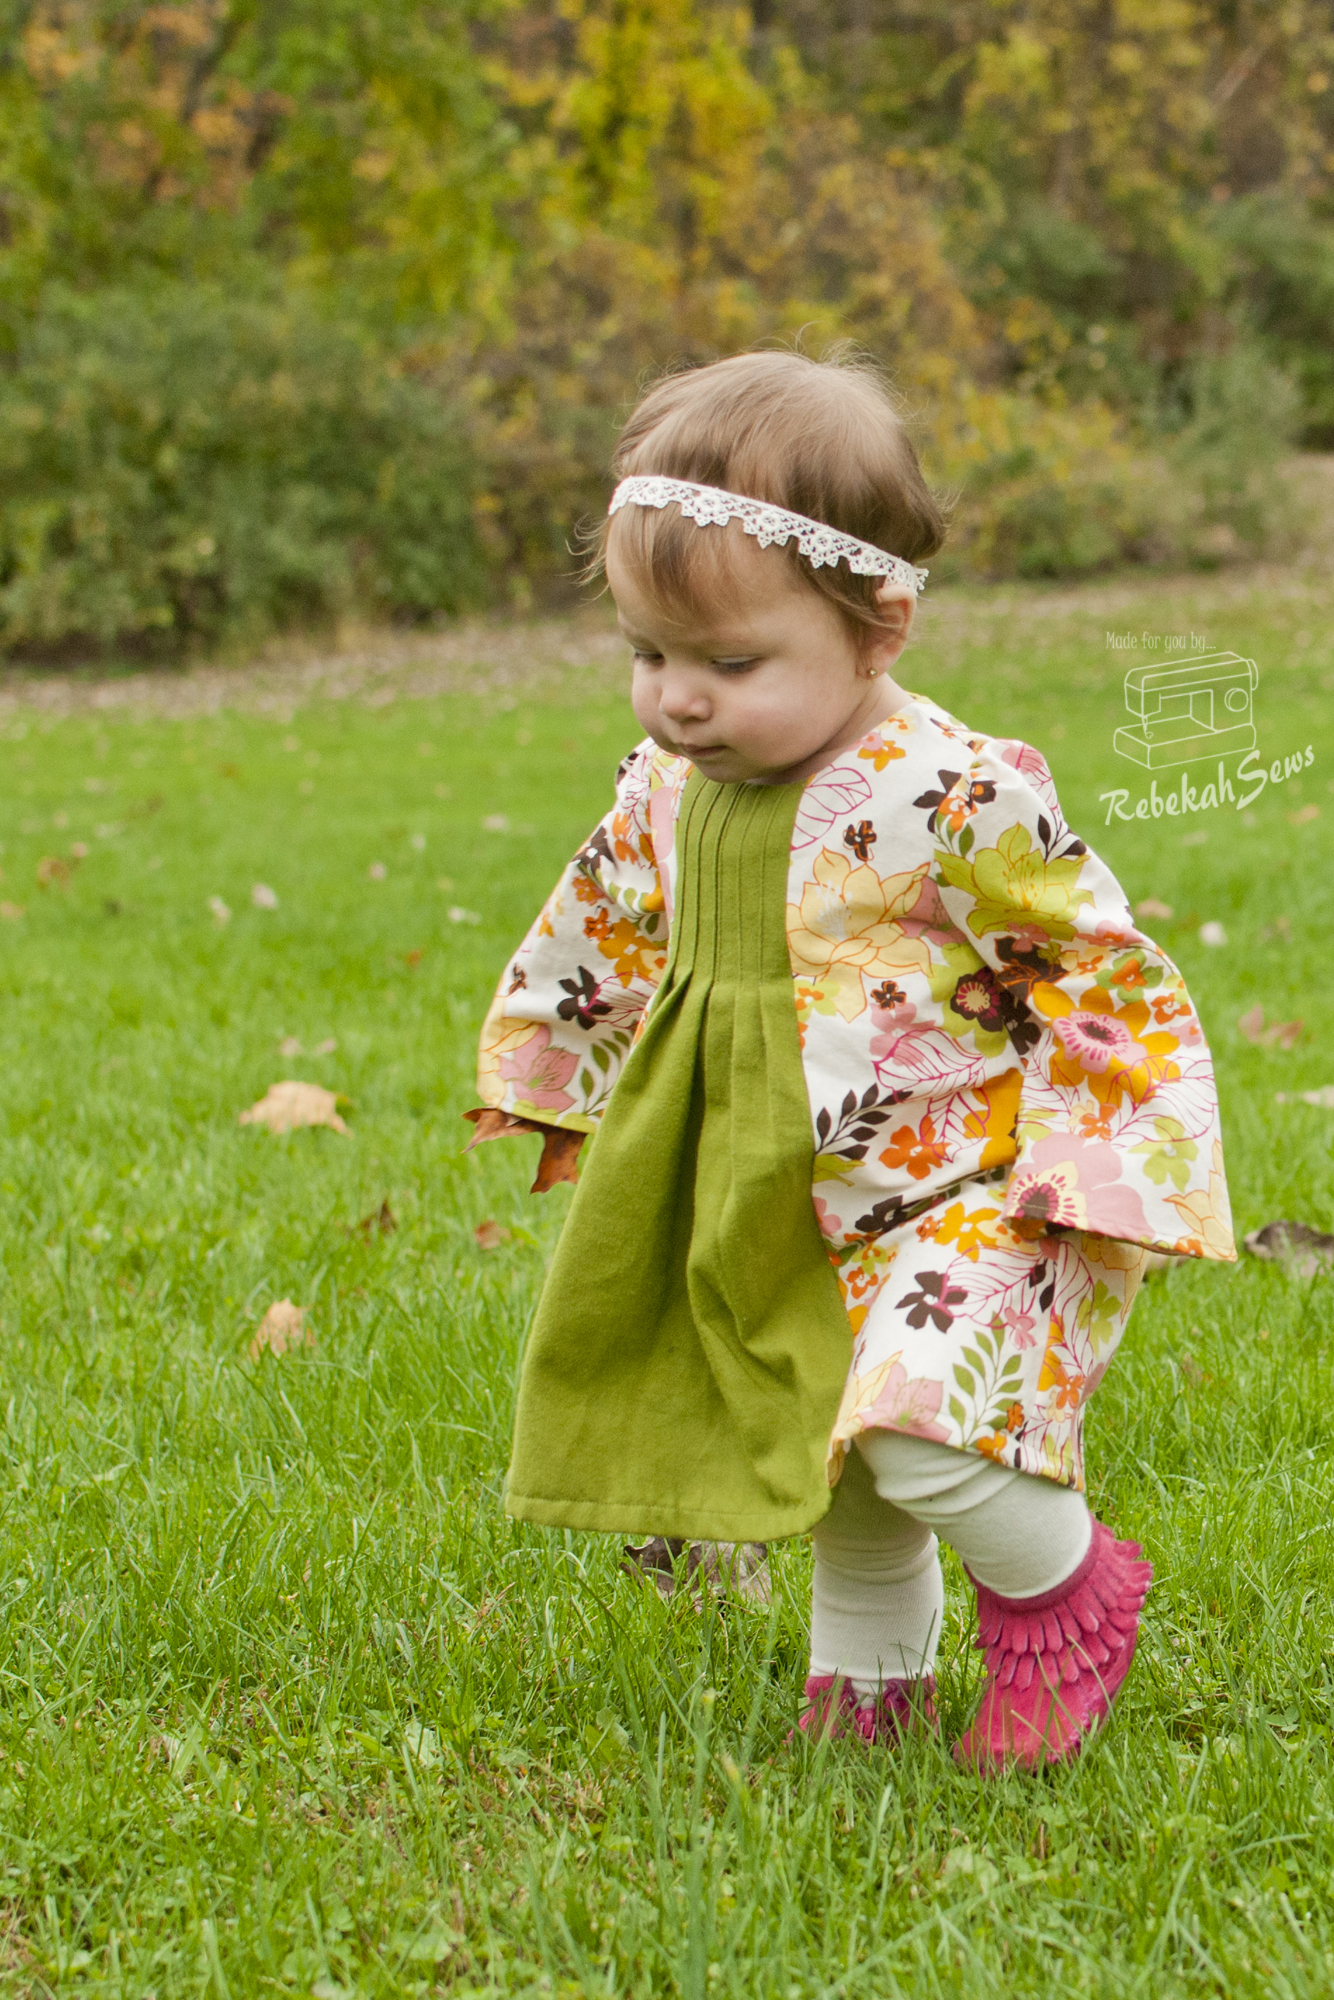

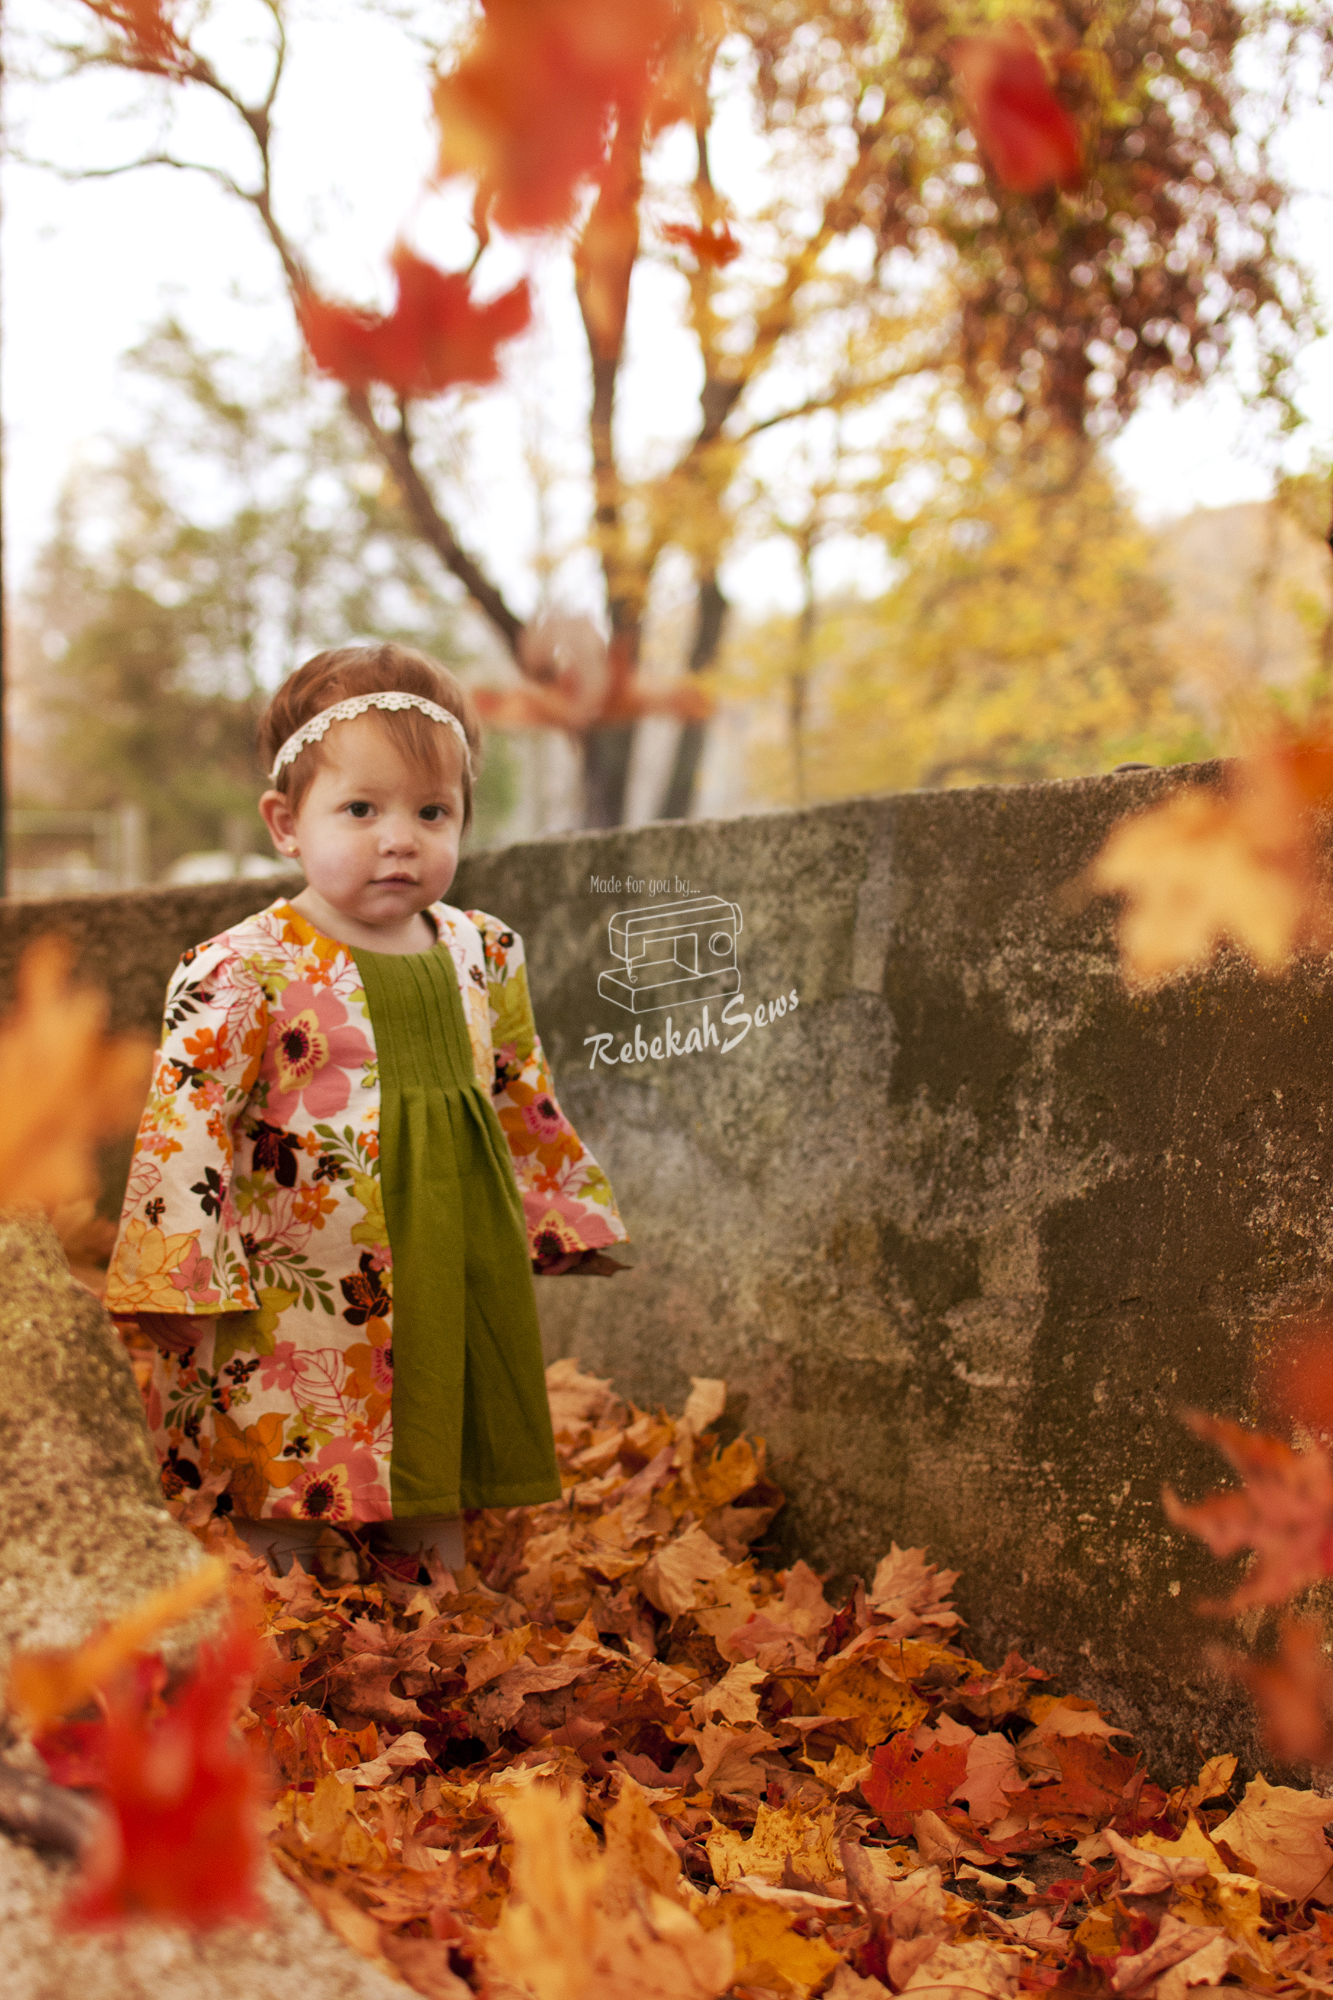
You ready to hear a little about my version?  My girl is just getting into size 12mo clothes, so I made her a size 1. The fit is great! A little roomy, but again, that is because she is just getting into size 12mo. For fabric I chose a fall floral and accented it with a green flannel center panel. I decided to do just plain pleats with no decorative stitching as well. Now when sewing the center panel to the side panels make sure you pin from the hem up to the neckline. This will make them line up correctly. If you go from the neckline down, they will not line up and you will have to seam rip.
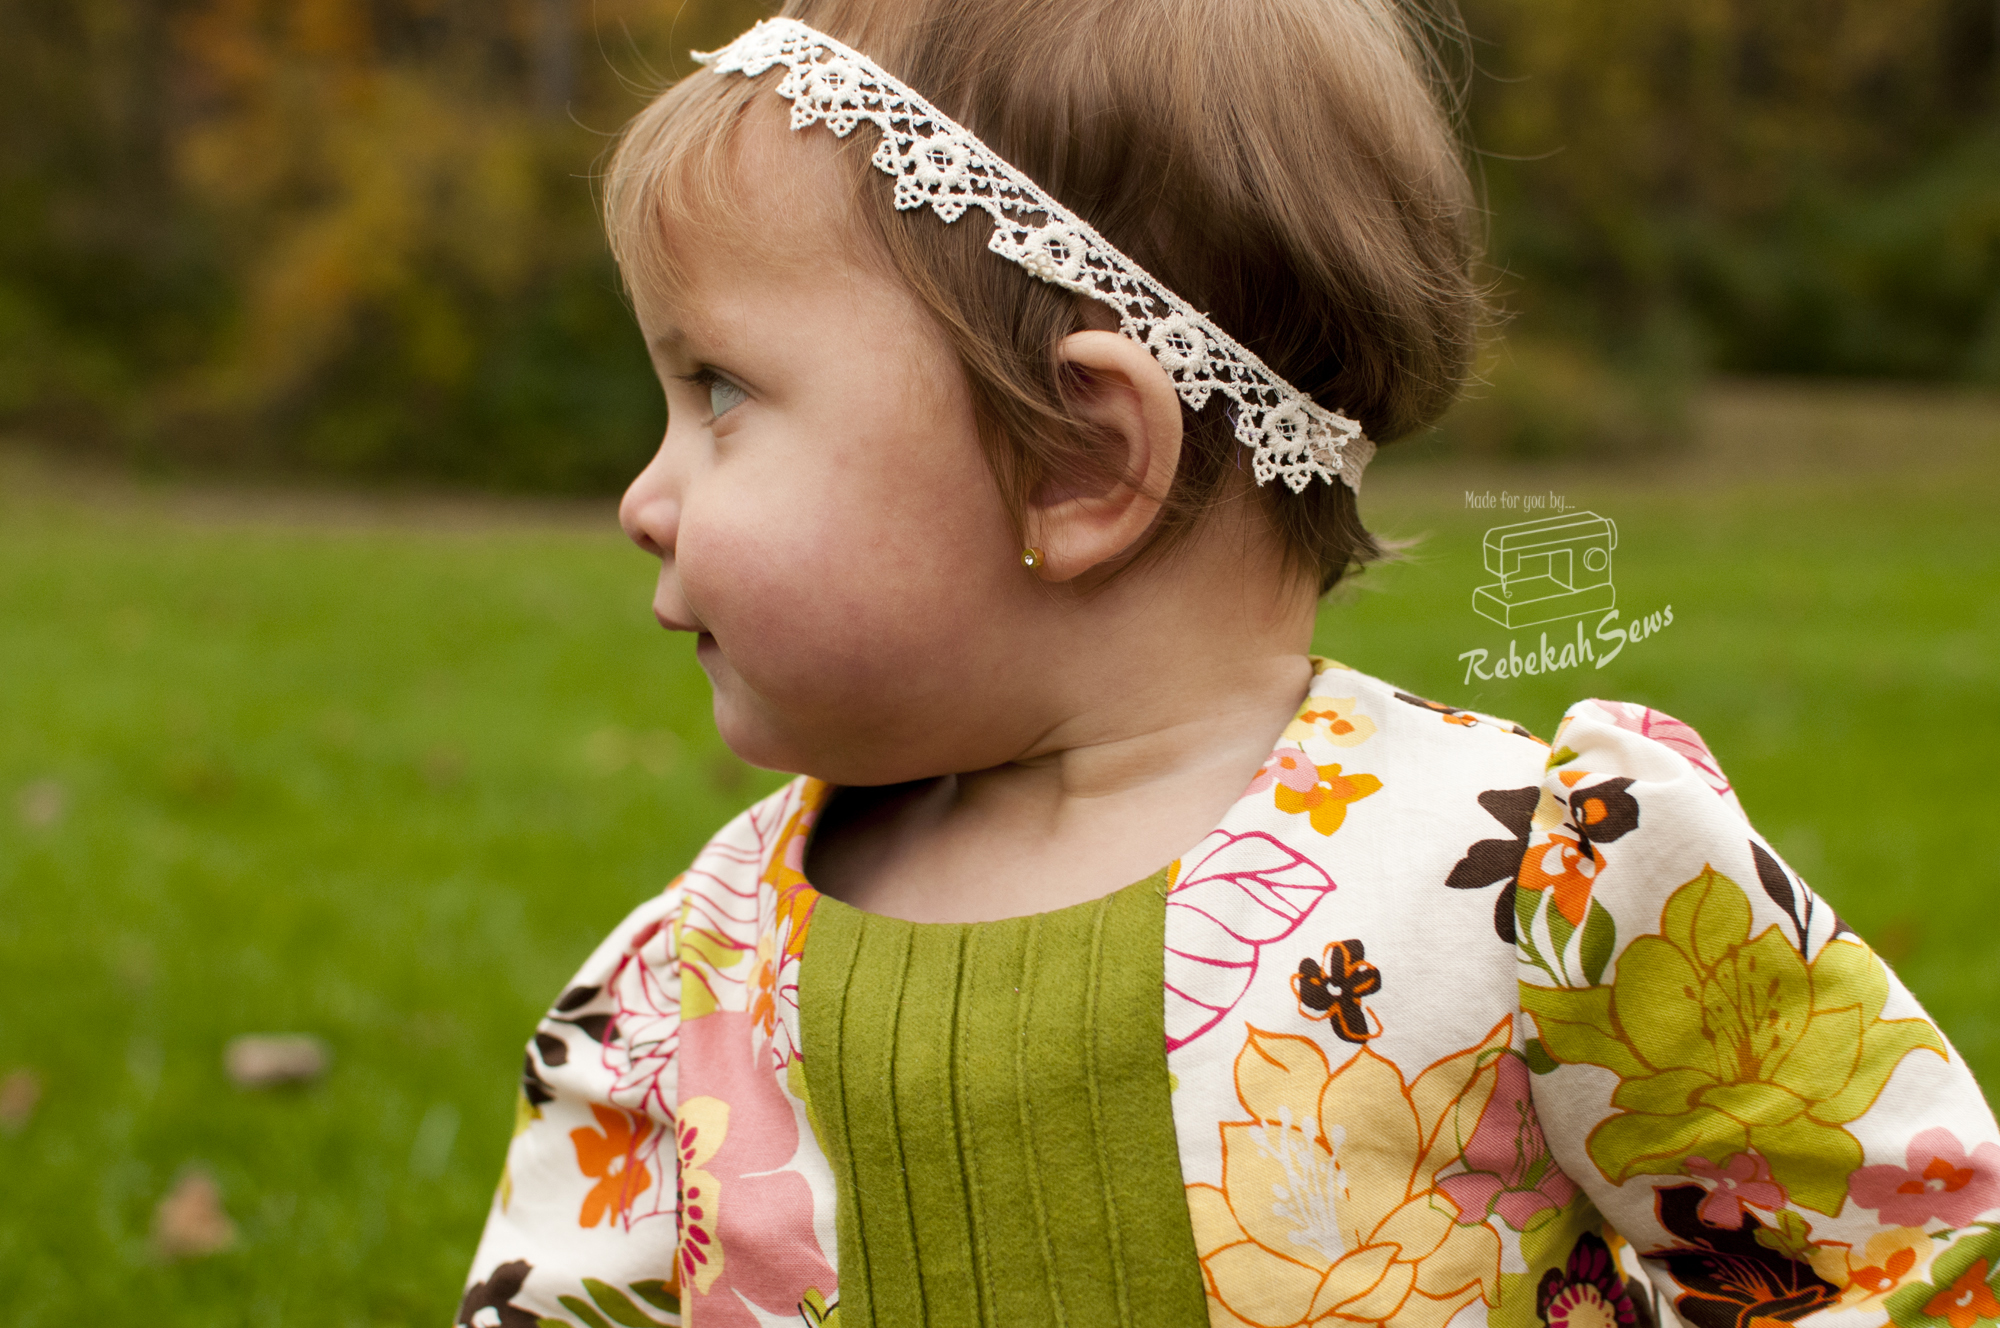 Just ask me how I know… Anyways, in the tutorial it calls for an elastic casing on the inside of the sleeve so that there is elastic around the wrist. I chose not to put the elastic in as I just love the bell sleeves, especially with the little shoulder poof that was created by the gathers. Just darling!

The end result is just stunning.  A simple elegance just radiates off this dress. Now that I have made one and have gotten used to the tutorial layout I could certainly make another in half the time. This really is a perfect little dress for autumn and even though I did have a little trouble with the tutorials, it was so worth it in the end!