Stitchwerx Designs Traveler’s Cape…Boy Style!

RTC_3487_1

It’s that time of year again! The time where you don’t need an excuse to dress up. Where the kiddos are demanding to be their favorite character from this year’s most popular box office hit. And I am sure you know the most popular one right now. By now you have seen a million different patterns for Elsa’s dress and even Anna’s dresses as well. However there is one that is not wide seen just yet. Anna’s cape. However this pattern is not just for a Princess Anna cape, nor is it just for the girls. This one’s for the boys too!

RTC_3564


RTC_3471

Has your interest been peaked yet? Well let me tell you about it! Stitchwerx Designs recently released their Traveler’s Cape and Joyce Ann Bonnet. Two amazing patterns that can transform any girl into a princess that can handle the cold! These two patterns aren’t limited to princesses though. They can be used for reenactment, Halloween, dress up, you name it! I know my little girl will be getting a set for Christmas photos this year. Can you imagine a Christmas plaid or even solids with a backdrop of snow…beautiful!! Unfortunately I didn’t have enough time to make her set now, but if you head on over to the listing you can see so many amazing photos of the bonnet. They really tell it all!

RTC_3571

RTC_3579

RTC_3441

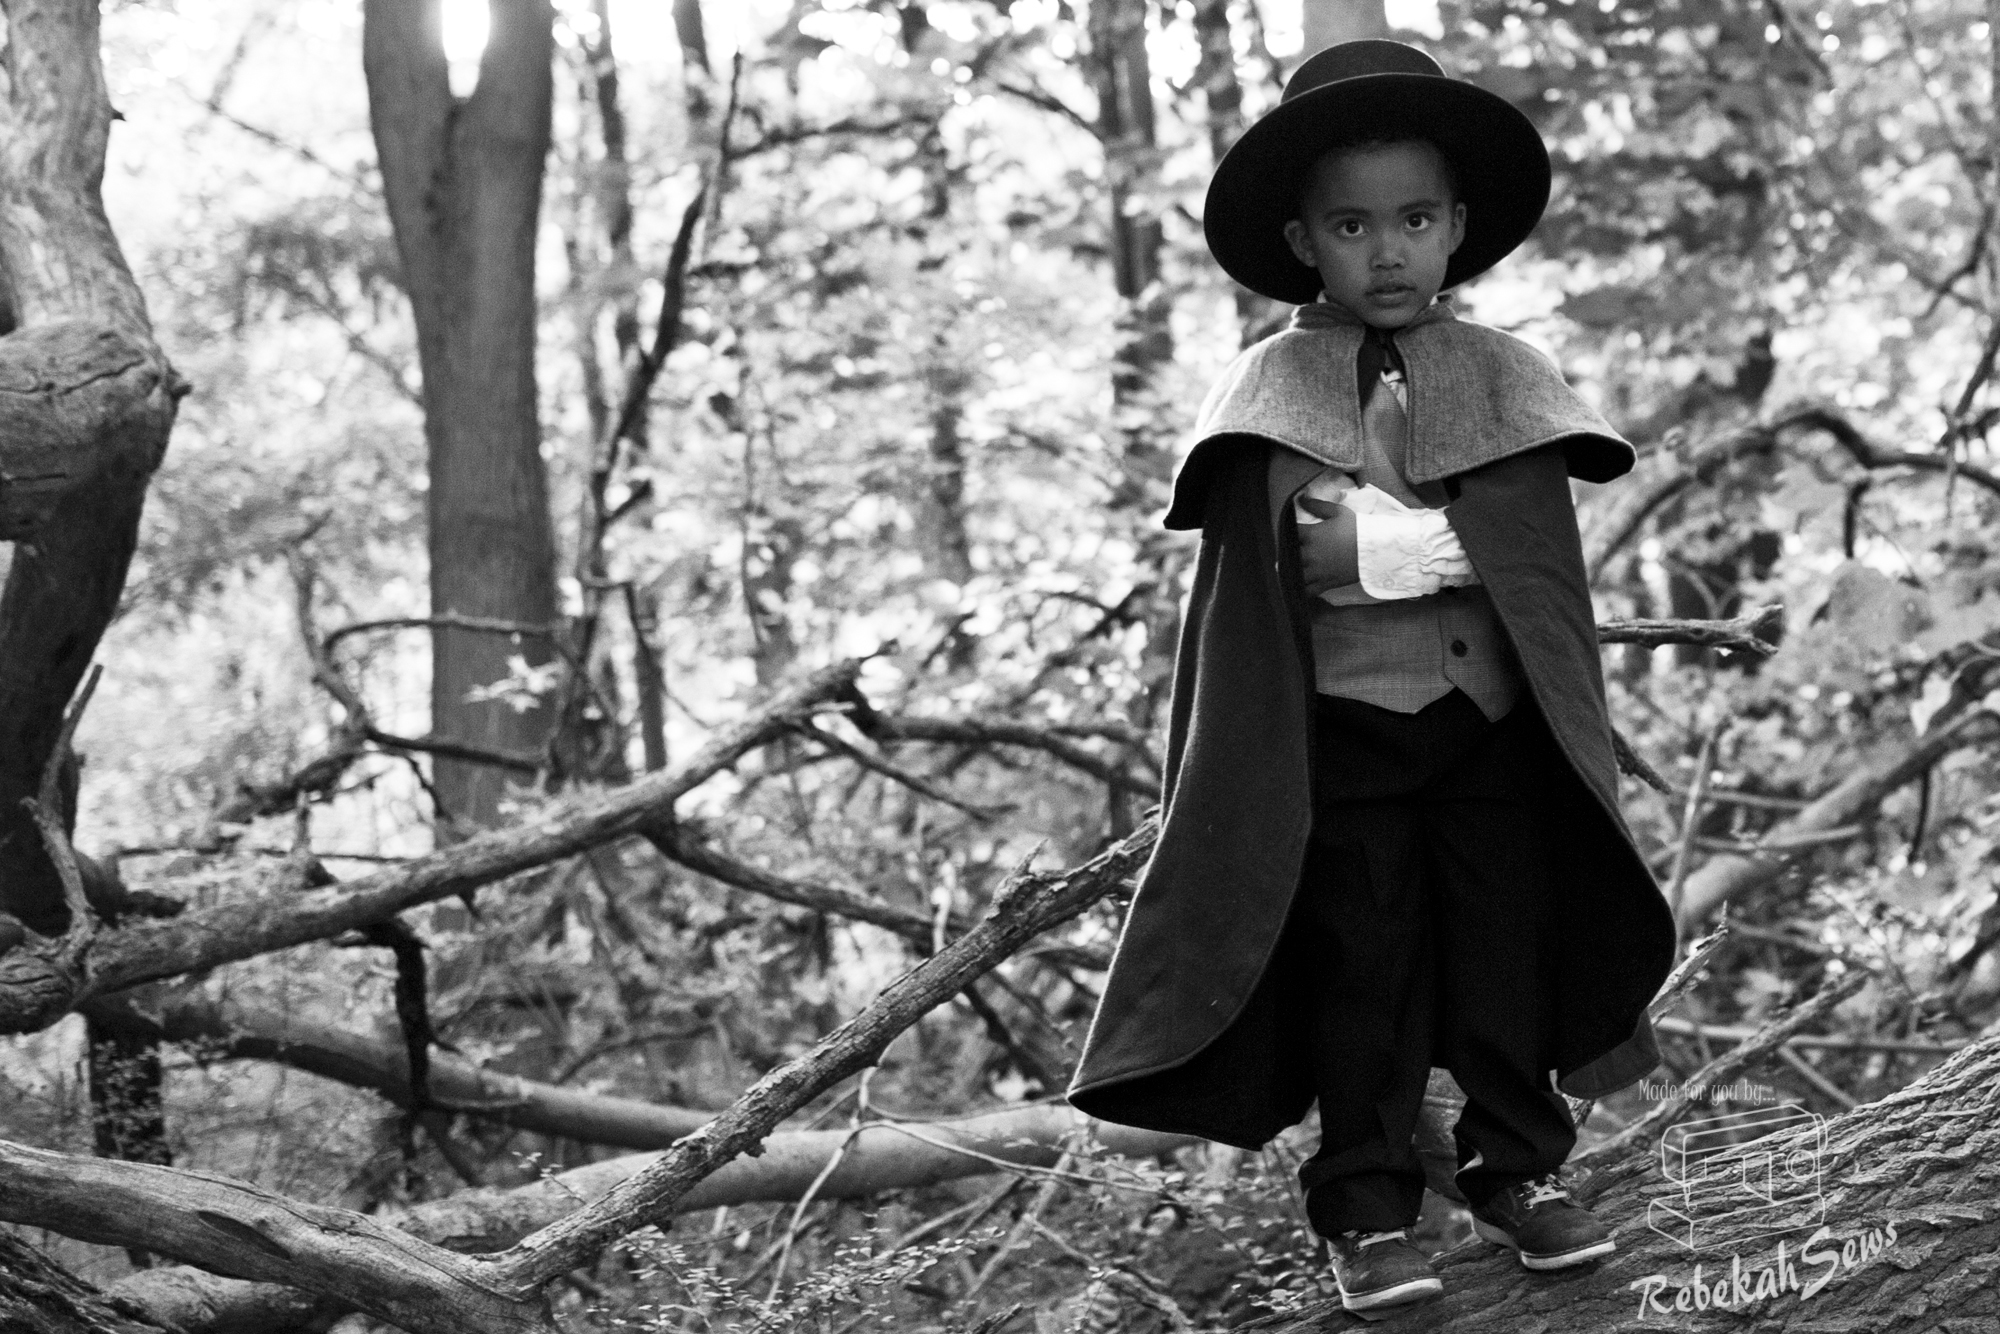
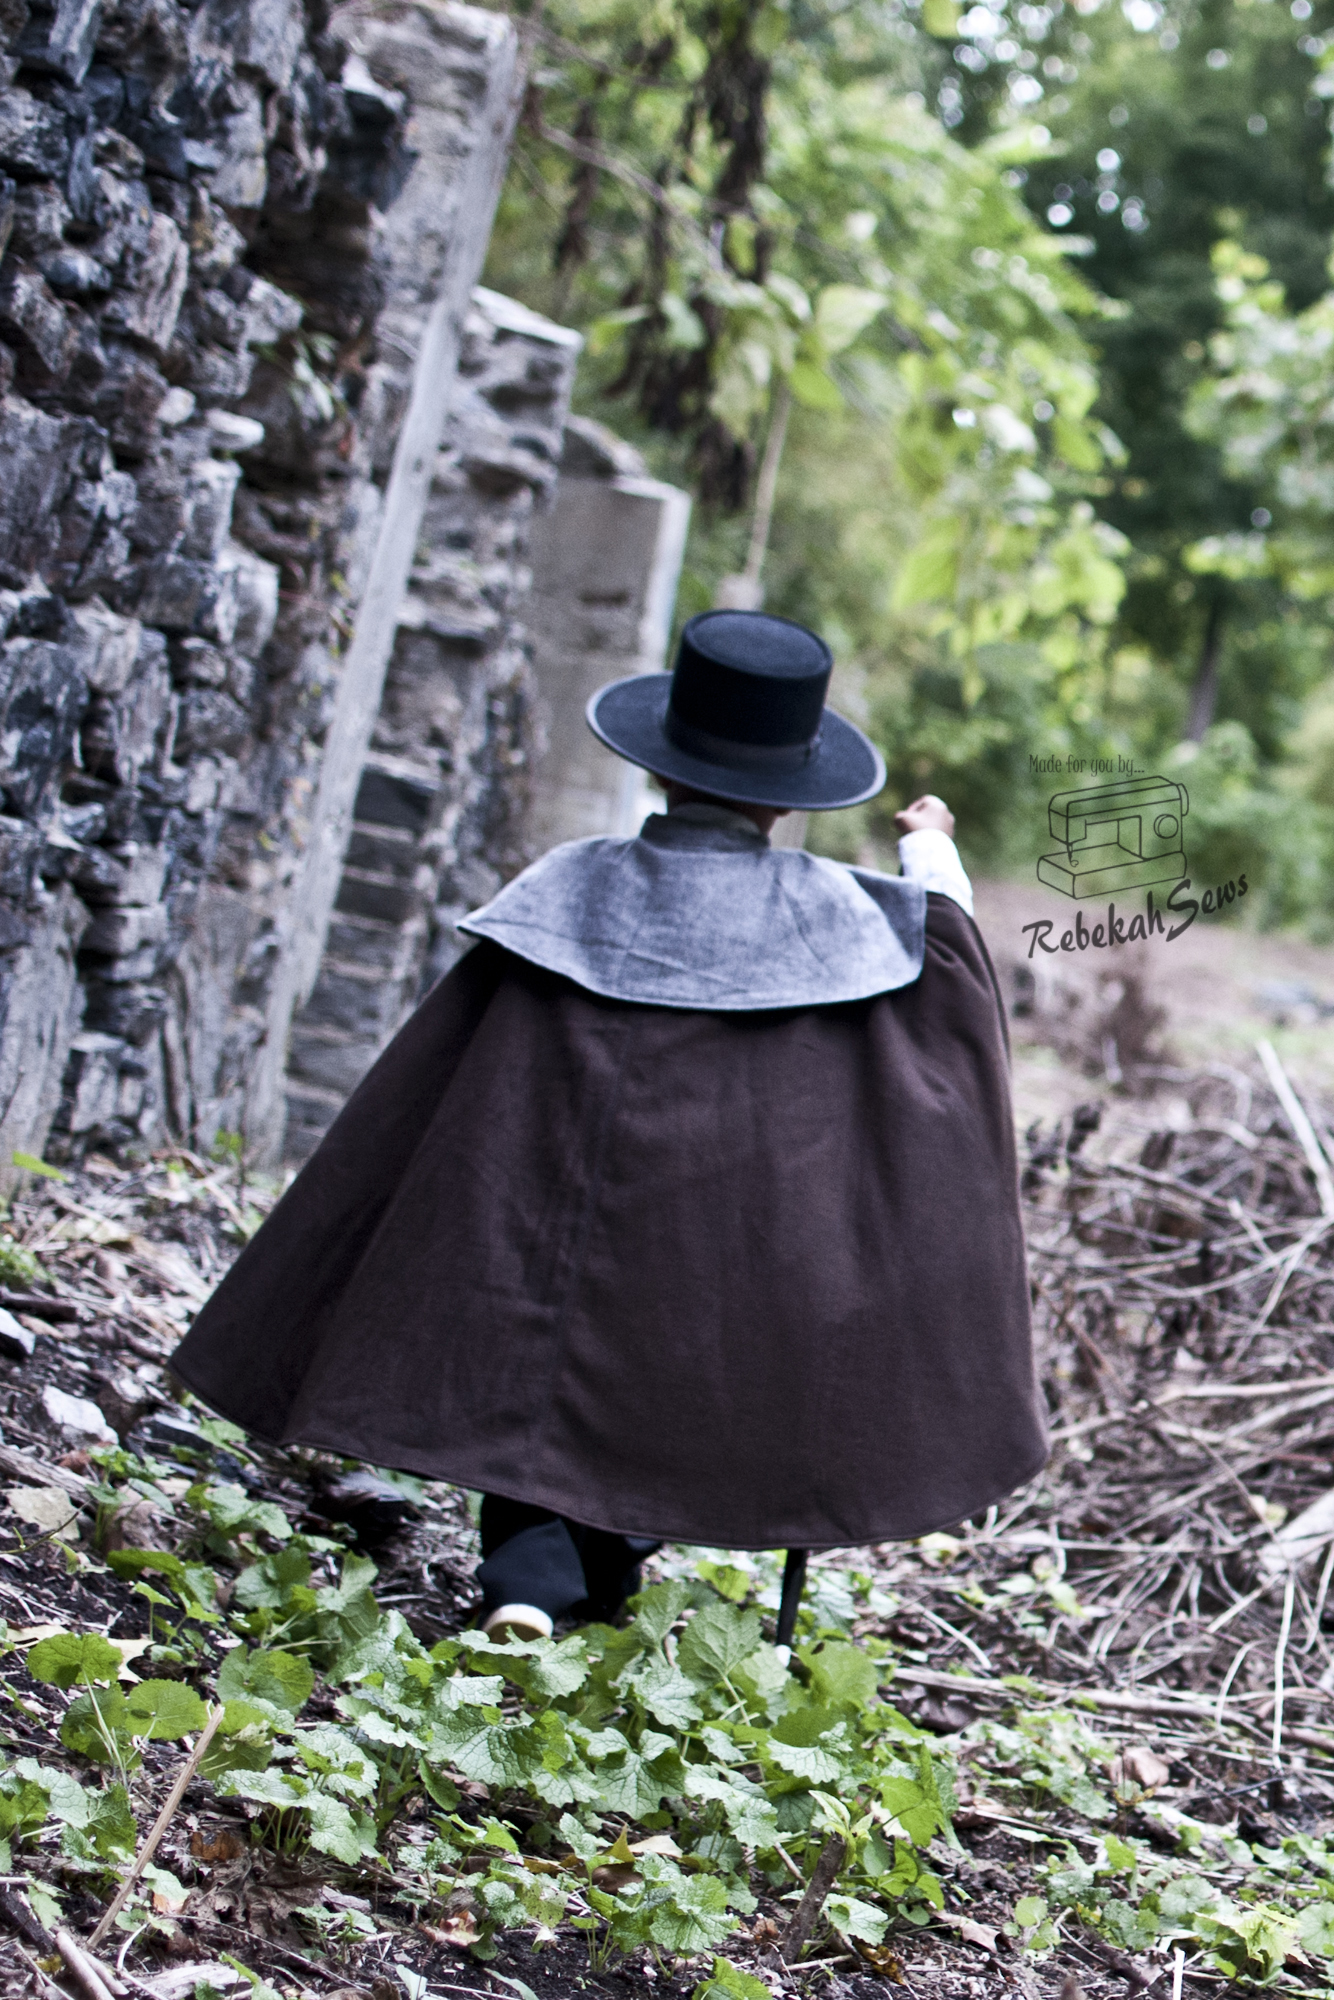
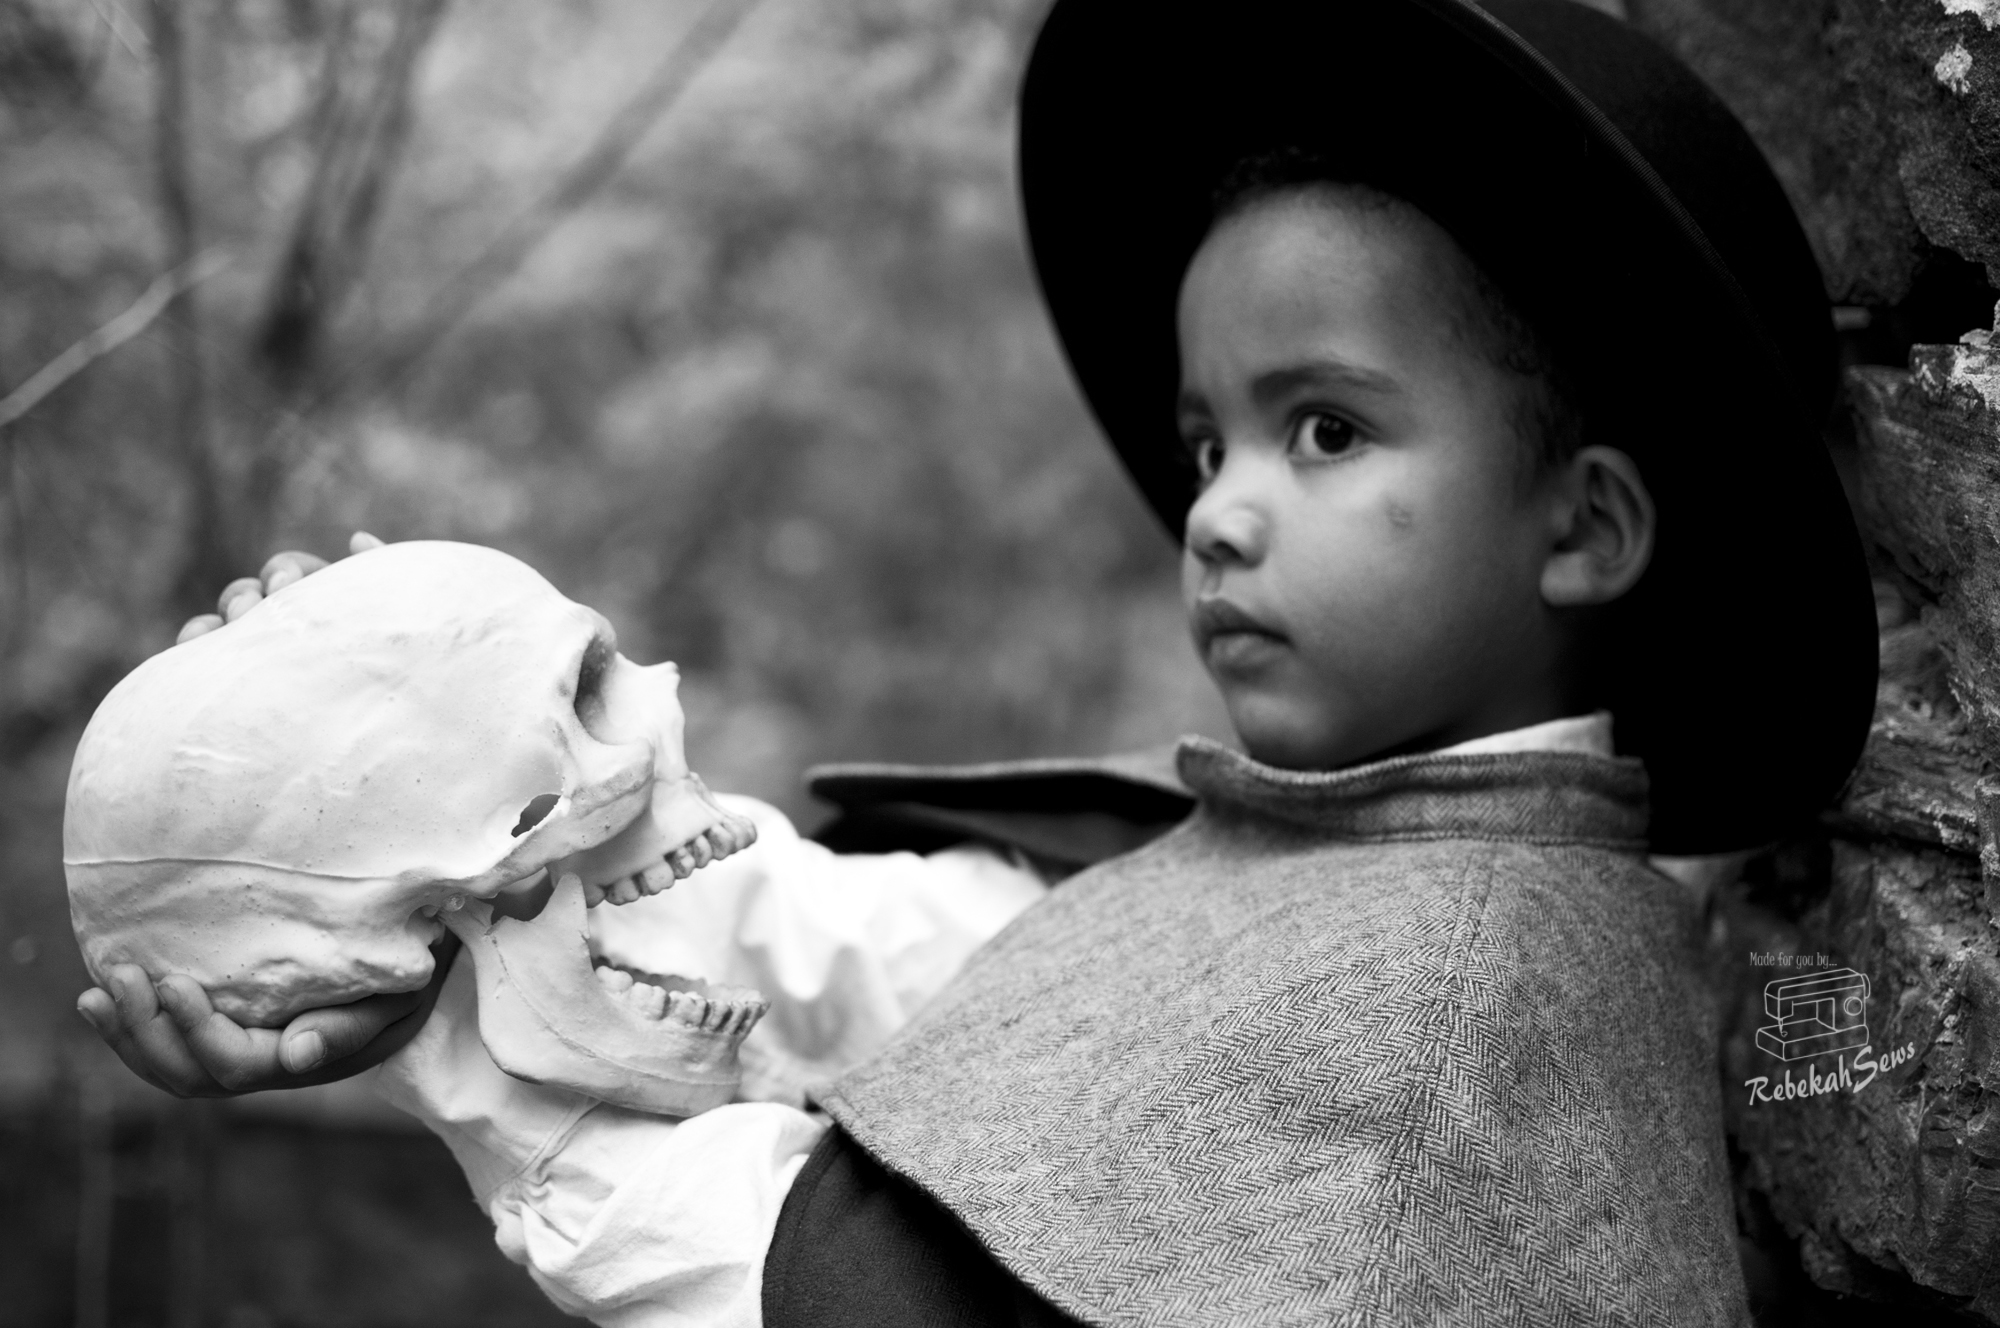
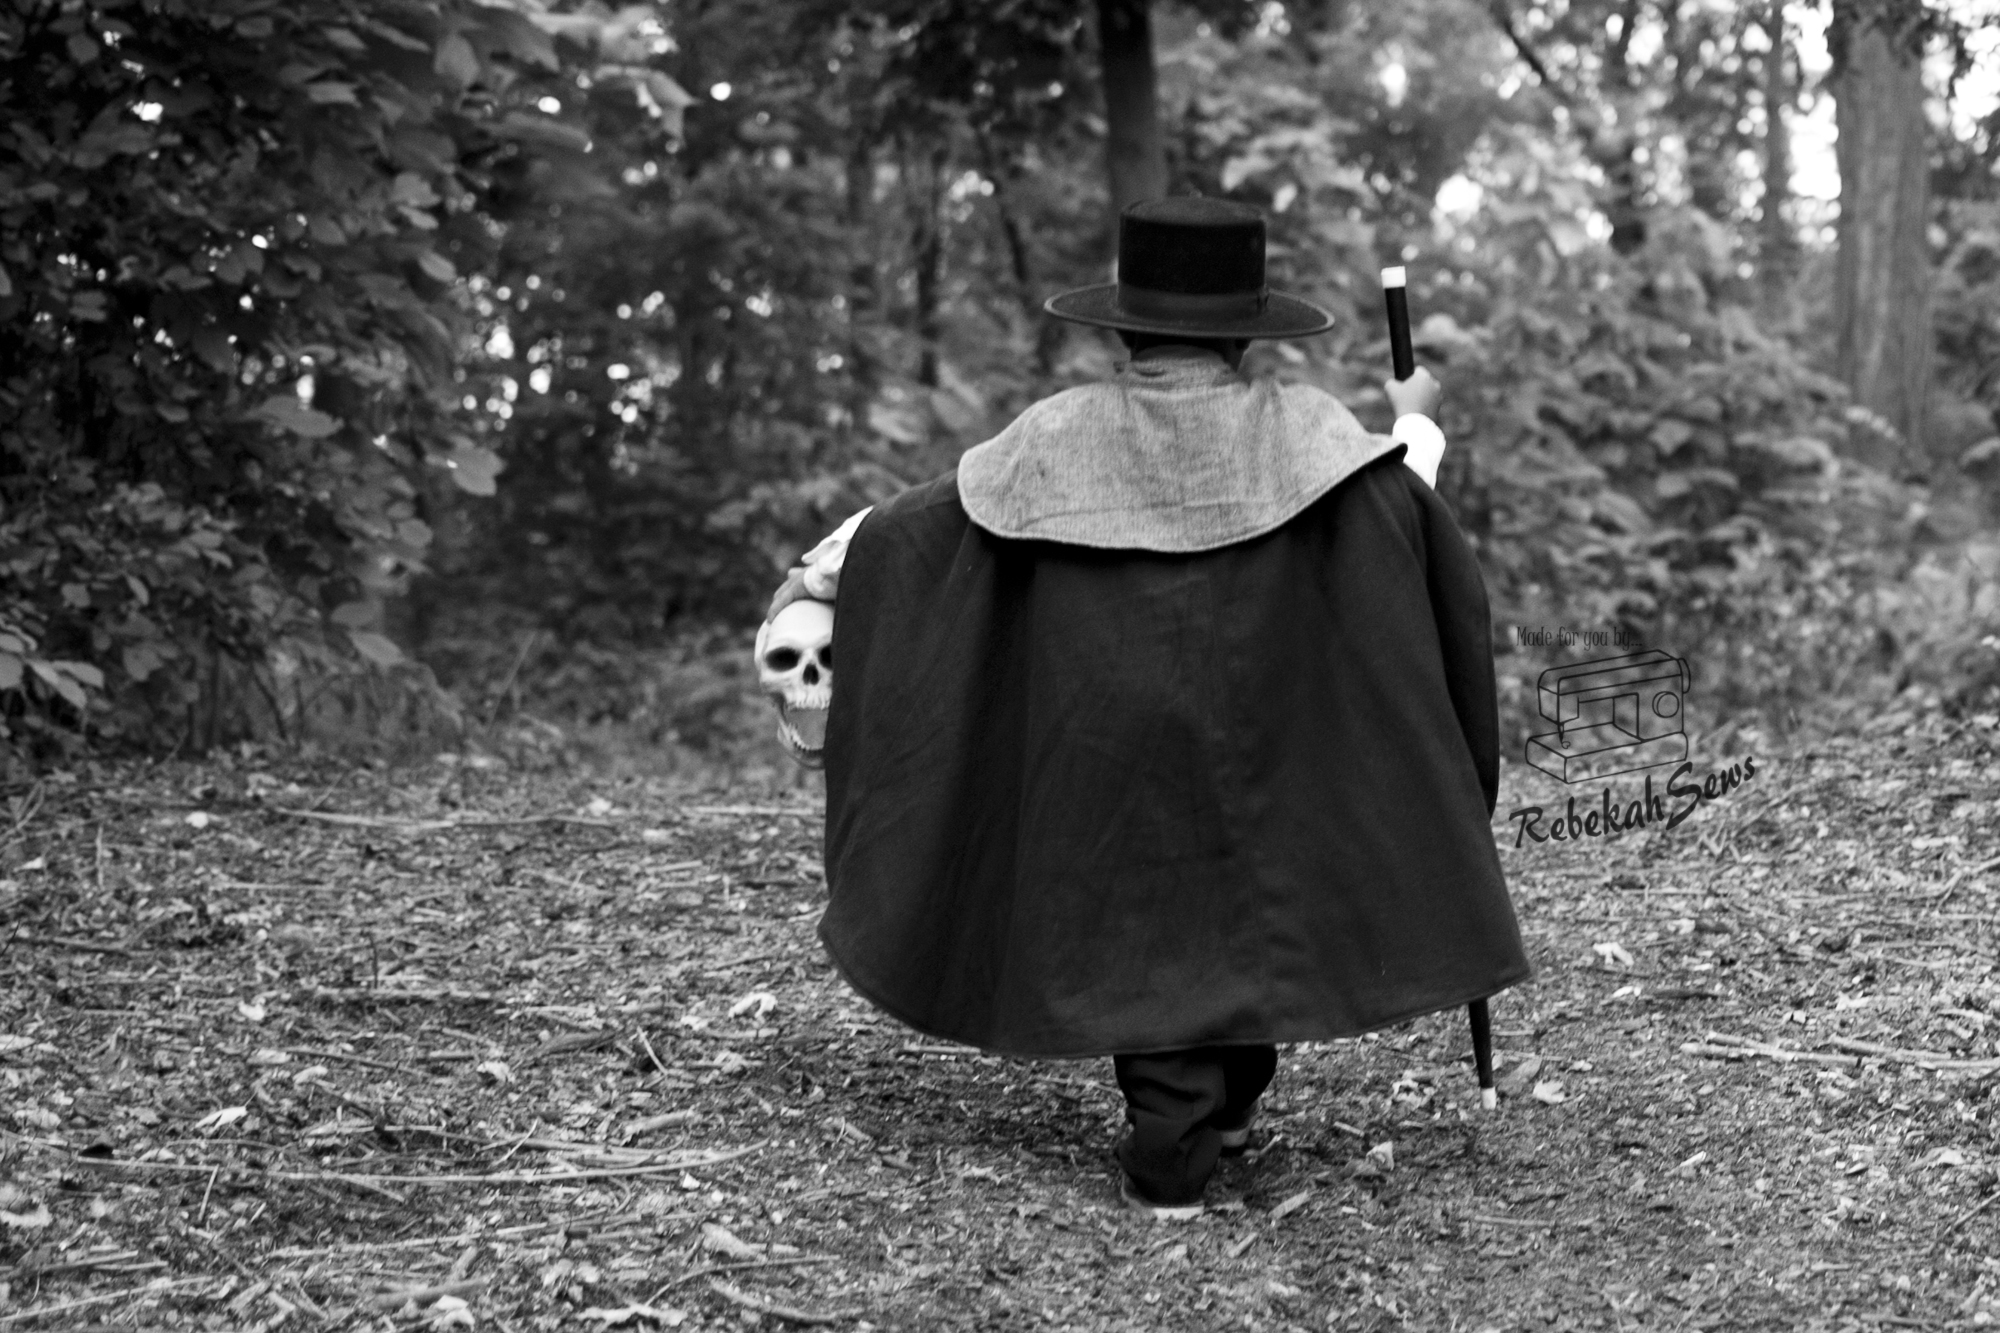
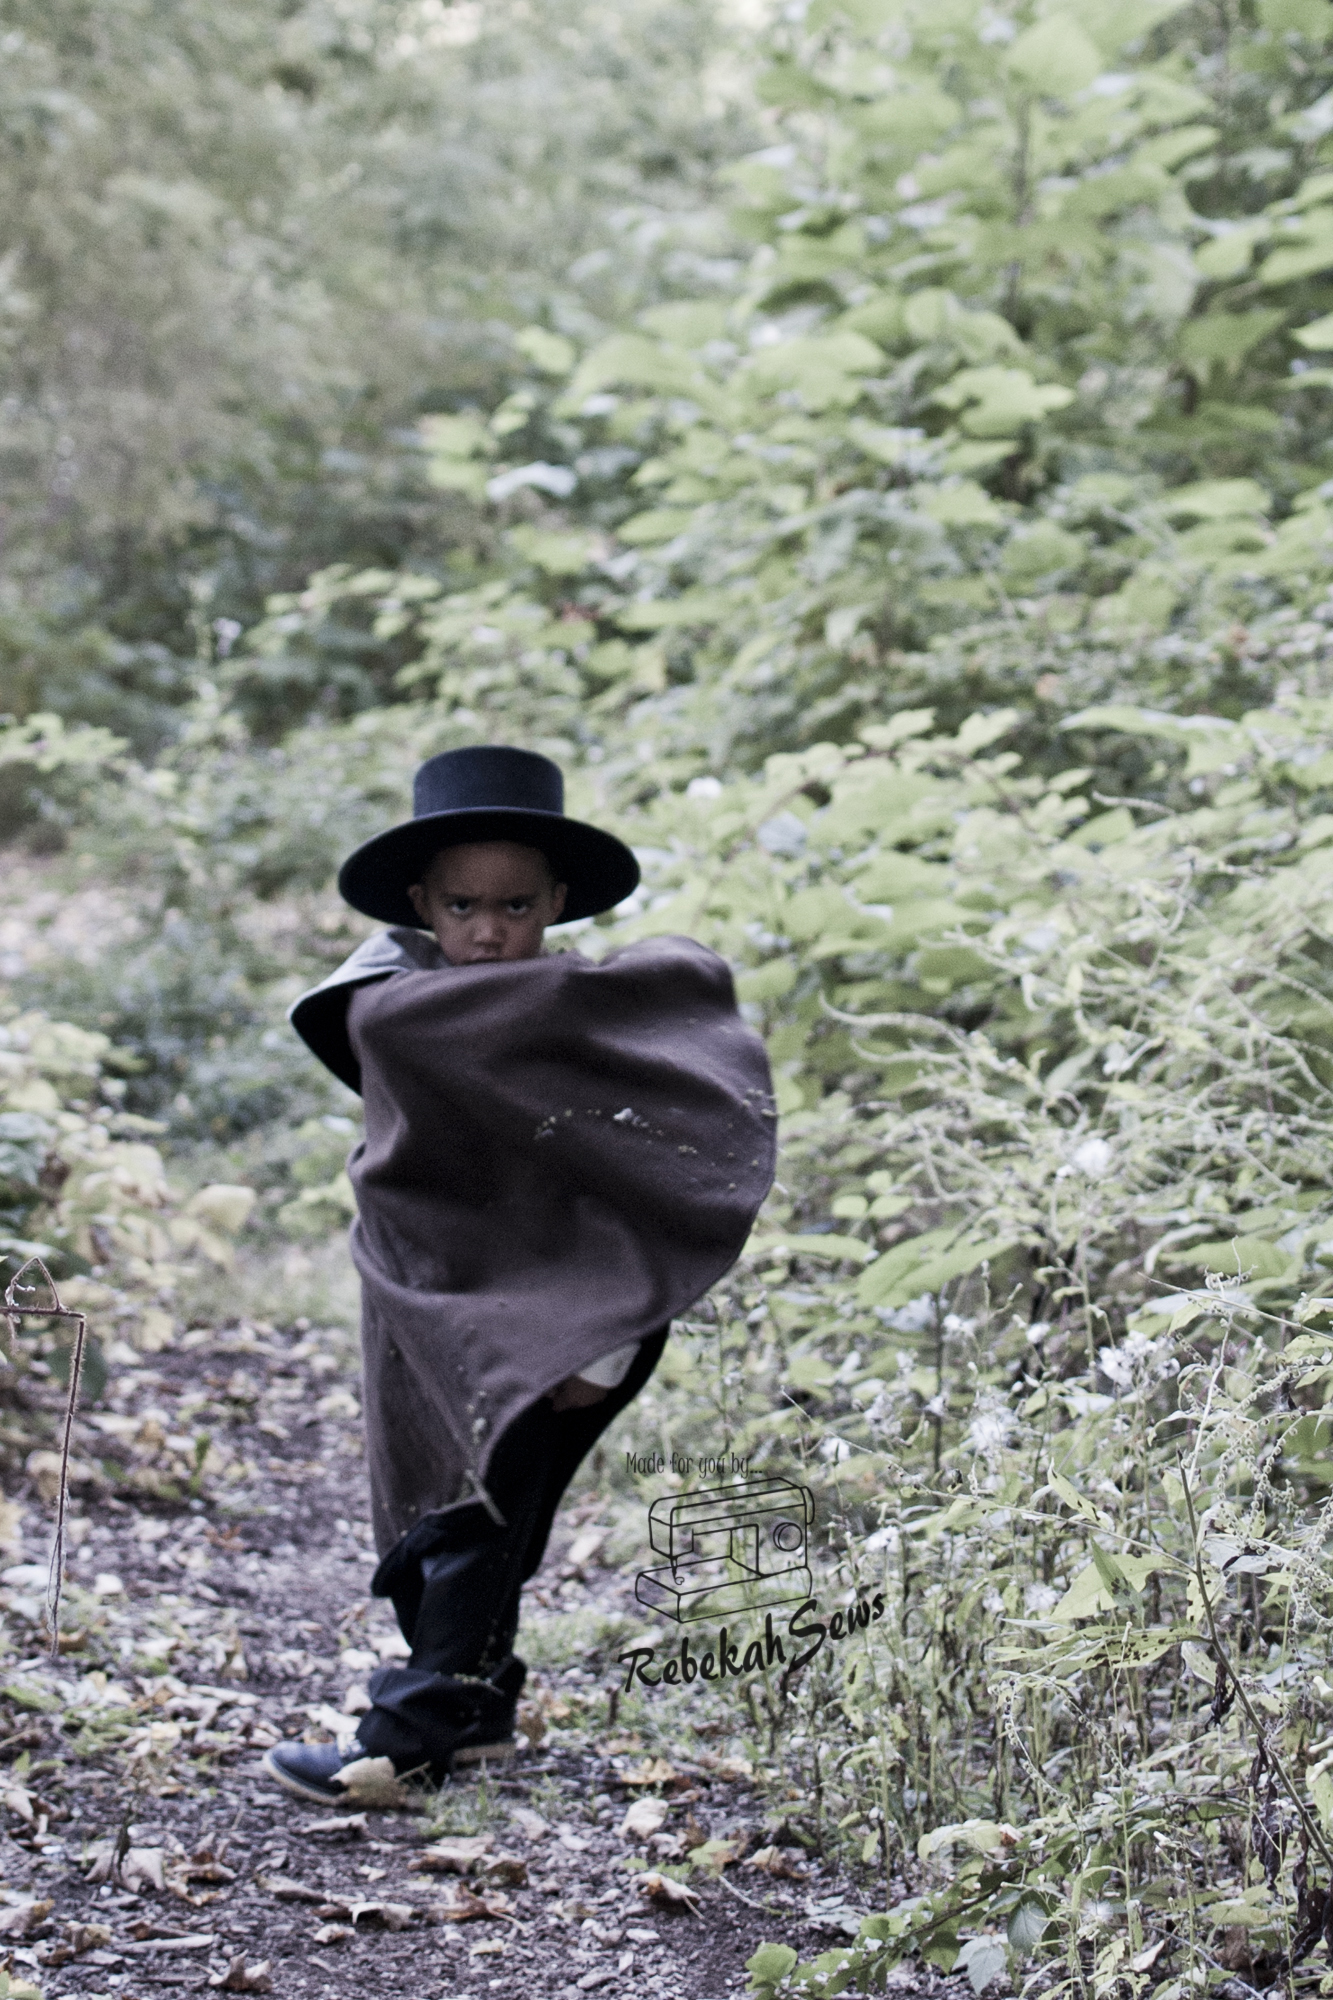
I really wanted to switch it up a bit and see what the Traveler cape could do beyond the typical Anna’s cape. This is where the boy sewing comes into play!! I won’t be limited to just Princesses.RTC_3460 Let the boys have some fun! Wizards, super heroes, magicians, detectives…anything really! Whether it be for Halloween or imaginative play, you can’t go wrong. The traveler cape comes in five sizes 12/18M to 8/10Yrs. This is fully lined with not exposed seams at all. The shoulders are fitted in order for the lay to be just right. It is perfect for a beginner too as the tutorial walks you through every step. What I love about this too is that you can make just the longer cape, the capelet, or both! Let your imagination soar with this. As you can see my son certainly had a LOT of fun with this.

RTC_3555


RTC_3617

For his cape I decided to go two tone for a little more fun.  Now in the pattern Kim gives a page of different closures. I decided not to choose any of them and instead made mine into snaps!  I used two taps instead of one and made them slightly adjustable too.

RTC_3438

RTC_3626

When Stitchwerx Designs and Mandy K Designs recently teamed up for a Frozen inspired giveaway, magic was in the air! While the giveaway is over with, the sale is still running strong! You can get the bundle of the Cape and Bonnet by Stitchwerx for only $10. And if your little princess is begging you to be Anna or Elsa then pick up the Princess Party dress by Mandy K too! It’s on sale for $5. Both sales last till September 30th so make sure you get it before the October.

RTC_3549

RTC_3429_1


Tinley Tee and Love Me Knot Tour with GYCT!!

RTC_1804

Time for another tour! I told you there were lots of exciting things happening. Today we are taking a look at two awesome and versatile patterns by Get Your Crap Together Designs. The name just always cracks me up! I love it. These two patterns are great paired together or with other patterns. Add that they are both quick and easy sews not to mention cute and it’s like adding icing on the cake. First I am going to tell you a bit about each pattern and then I will tell you all about my little girl’s outfit I made using these patterns. I had fun with these!

RTC_2030

So let’s take a look at the first pattern shall we? The Tinley Tee comes in sizes 12mo-12yrs. RTC_1951Included are 4 sleeve options (flutter, gathered cap, short and long sleeves) and 2 hem options (regular or banded). Chelsea does a great job on the tutorial with all the photos and step by step instructions. Truly a beginner could do this! Because of all the options this is a staple for any girls wardrobe no mater the season. The tutorial even includes instructions on how to layer the sleeves for even more fun!

RTC_1815


Can’t have a top without a bottom to pair it with! And what would be better than the Love Me Knot shorts.RTC_1946 These are just super cute shorts. I have actually made 3 all at different times, but it goes to show you that it’s so cool I keep coming back to it. Sizes range from 6mo-12yrs. These are bubble style shorts that are hemmed with bias tape. Featured on the side is a little keyhole with ties to tie into a bow. There are also optional gathered pockets! The waistband is a flat front waistband with elastic in the back which makes it easy for a customized fit. Everyone can have a little love with these as they are perfect for a beginner or advanced seamstress.

RTC_1781

As summer is ending and fall is fast approaching I thought I would use this tour as an opportunity to start on a fall/winter wardrobe for my little girl. For the Tinley Tee I decided to upcycle an old sweater of mine into a new sweater for her.RTC_1962 Now I should start by saying that baby girl is technically still in a size 6-9mo. That being said I still decided to stick with the size 12mo in hopes that by the cold months she would grow into it. Secondly I have never upcycled a sweater before and after completion realized that it is (at least mine) was a lot stretchier than regular knit fabrics. Result: a really cute super comfy oversized sweater for baby girl! In order to keep the original hems on the sleeves I just cut off a 1/2″ to the bottom of the pattern piece. For the hem of the shirt I didn’t cut off the hem allowance as I wanted it a bit longer. Also for the neckline I used the original collar on the sweater. RTC_1877It’s not as stretchy as normal knit so I had to lengthen the neck binding. This gave it a more open neckline which will look super cute with a turtle neck under it for the really cold months! Despite it being on the bigger side and needing to roll the sleeves a bit, I just love it! If the original sweater had been as comfortable as this sweater looks on baby girl I wouldn’t have upcycled it!

RTC_1988

Now for the Love Me Knot Shorts. As you can tell by the photos (we had a fun nature walk can you tell?) I made them into pants! How did I do this? RTC_1759On the pattern piece right above the keyhole extending over to right below the inseam curve I drew a straight line and cut. I then added paper under that line to extend the leg. Once I added the amount I needed to be long enough for baby girl I attached the bottom of the original pattern piece (the keyhole) to the added paper. My one mistake was then tapering the leg. I totally forgot I needed to leave the wide width of the pant leg in order to gather it before hemming it with the binding. So my hems have no gathering. Still look so cute though. I also didn’t add any pockets as I prefer no pockets for babies as they don’t use them. RTC_1772I know they are cute, but that’s just a personal preference. Also the pattern calls for 1/2″ bias tape. I like to use 1/4″. It can be a little trickier to attach but in the end it looks daintier. I will be making more of these for the colder months!

RTC_1971

Isn’t it amazing what you can do with these two patterns? Different fabrics, different options, different looks every time! Know what’s even better? You can enter win both patterns! Just click on: a Rafflecopter giveaway to enter. If you don’t want to wait, and I can totally understand your impatience, then head on over to the Etsy shop and buy them both. Use coupon code “SAVE15” to get 15% off. Don’t forget to take a look at her other patterns too! They are all amazing!

RTC_2007

Image Map


Sailing Away with Perfect Pattern Parcel #4!

Pattern Parcel #4Ready for more boy sewing?? It’s time for the Perfect Pattern Parcel #4 and it’s for the boys! Don’t worry, girls will enjoy it too. I must say I am very excited to be a part of this tour especially because in the parcel there was a non clothing option for the boys! First a little about the Perfect Pattern Parcel though.

RTC_1662

Did you know that part of the sales goes into helping educational equality? Yup that’s right. All profits after the costs of the sale go directly into charity. So not only do you get to pick your own price for all the patterns (as low as $15 for all 5 patterns or spend $26 and get a bonus pattern!) but you are helping a worthy cause. If that isn’t enough reason to buy more amazing patterns than I don’t know what is!!

RTC_1670

RTC_1695

Now for my tour date I decided to sew up the Jet Pack Bag by Betz White. I wanted to sew more than just clothes as I am stuck in my very well padded comfort zone. So in order to do that I needed to sew something I don’t normally do: bags, and sew something I don’t really like: zippers. Besides one little man was much bummed as he was going to use a hand-me-down backpack for Pre-K and he really wanted a new one instead! Well mama to the rescue. He was extremely happy with the results and even hugged the backpack! But I digress. I am sure you want to hear more about the actual backpack don’t you?

RTC_1715

RTC_1691

It is a good size without being overly big.RTC_1718 The dimensions are 12″W x 14″H x 3″D. This is designed to use medium weight wovens; I used home decor fabric on mine. I really like the vertical format which gives it enough room for folders, notebooks, and a binder or two. There are two pockets on the inside and two on the outside as well. The best feature though is the fact that it can convert from a back pack to a shoulder/messenger bag with just a couple clicks of the swivel hooks! RTC_1756This is rated an intermediate pattern mainly because of all the pieces and that you have to fuse either interfacing or fusible fleece to every pattern piece. There is also some hand sewing in this pattern but there is a reference in the beginning on how to do the different hand stitches. Great right?!

RTC_1747

I will admit I am a HUGE procrastinator. Because of this fact I had to get a little creative with my bag.RTC_1729 I waited till the last minute to buy all the hardware I needed for the bag. Laughing yet? Well, it may come to no surprise to many of you that Joann’s didn’t carry everything I needed. So instead of swivel hooks I used D rings and carabiners or what I call parachute hooks. Then I also had to repurpose a bar slide off an old bag that I found at Goodwill. Lesson learned: order ahead. Now the tutorial is fairly easy to understand. It is different from the tutorials I am used to in that not every step had a diagram. I found this to still be fine though as there was always a diagram when I needed it.RTC_1738 I did have an issue when attaching my lining around my zipper onto the main bag, but this was more the user and not the pattern. This is because you have to use a ladder stitch to do this. Perhaps it was just too late at night and my brain turned off but I couldn’t for the life of me get my stitches right. So instead I used some fusible tape and fused by zipper lining to the zipper instead. RTC_1658Be careful if using a plastic zipper though. Yes I melted mine a little. Fortunately it didn’t hurt the functionality of the zipper. Phew! The only change I made to the pattern was I used Velcro to close the front pocket flap instead of hardware. I figured this would be easier for my little man! Worked like a charm and I even added a decorative vintage button to the flap! Isn’t it divine??

(Shhh…You found it!!)

SCAVENGER HUNT BUTTON

Halloween Hack Scavenger Hunt!


RTC_1695

Want to get your own now? Head on over and get your parcel! You really can’t go wrong with any of the patterns. I am so looking forward to sewing up more items with the other patterns. And I know you will love it as much as I do!!

RTC_1688


Parcel #4 Inspiration Tour Schedule:

Friday, August 22

casa crafty ||

Lulu & Celeste ||

Keep Calm and Carrion

Saturday, August 23

Max California ||

Amanda Rose


Sunday, August 24

little betty sews


Monday, August 25

Kadiddlehopper ||

Radiant Home Studio

Tuesday, August 26

La Pantigana ||

Boy, Oh Boy, Oh Boy Crafts ||

Friends Stitched Together

Wednesday, August 27

Make It Perfect ||

Modern Handmade ||

GYCT Designs


Thursday, August 28

Needle and Ted ||

Mae & K ||

Mimi’s Mom

Friday, August 29

Pienkel ||

Once Upon a Sewing Machine ||

Friends Stitched Together

Saturday, August 30

FABulous Home Sewn ||

Gray Skies ||

The Crazy Tailor

Sunday, August 31

Nine Stitches ||

Max California ||

Oliver’s Fancy ||

Friends Stitched Together

Monday, September 1

a happy stitch ||

lady and the gents ||

Our Family Four ||

Swoodson Says

Tuesday, September 2

verypurpleperson ||

Things for Boys ||

The Crazy Tailor

Wednesday, September 3

Our Family Four ||

Rebekah Sews ||

a happy stitch

Thursday, September 4

Sew a Straight Line ||

la inglesita ||

Made by Sara ||

Knot Sew Normal

Friday, September 5

Knot Sew Normal ||

Gracious Threads ||

Sofilantjes ||

Max California