Christmas is in the air! Getting ready with EYMM!

kenzies holiday tour

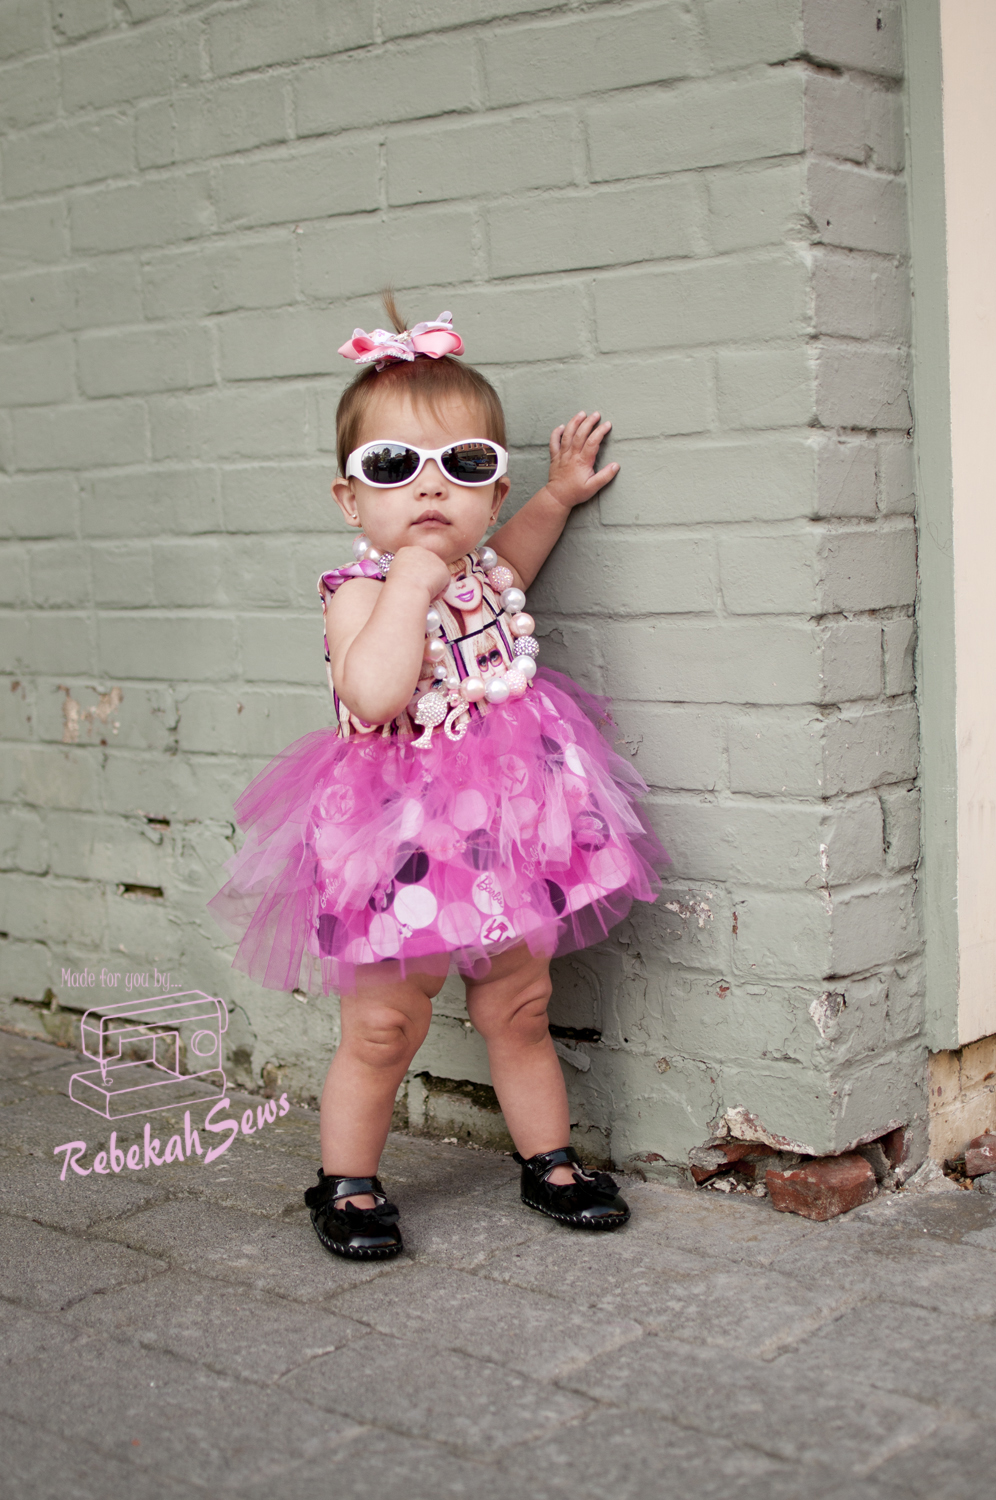
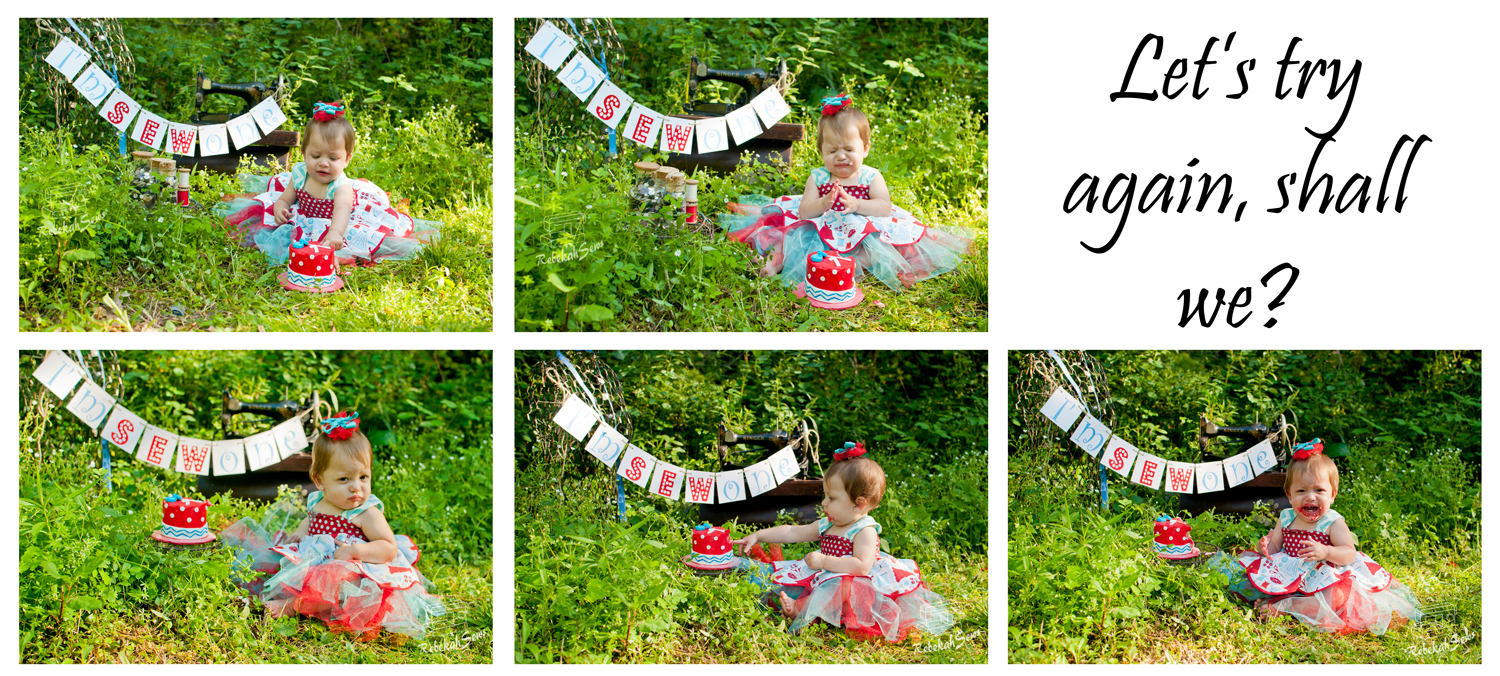
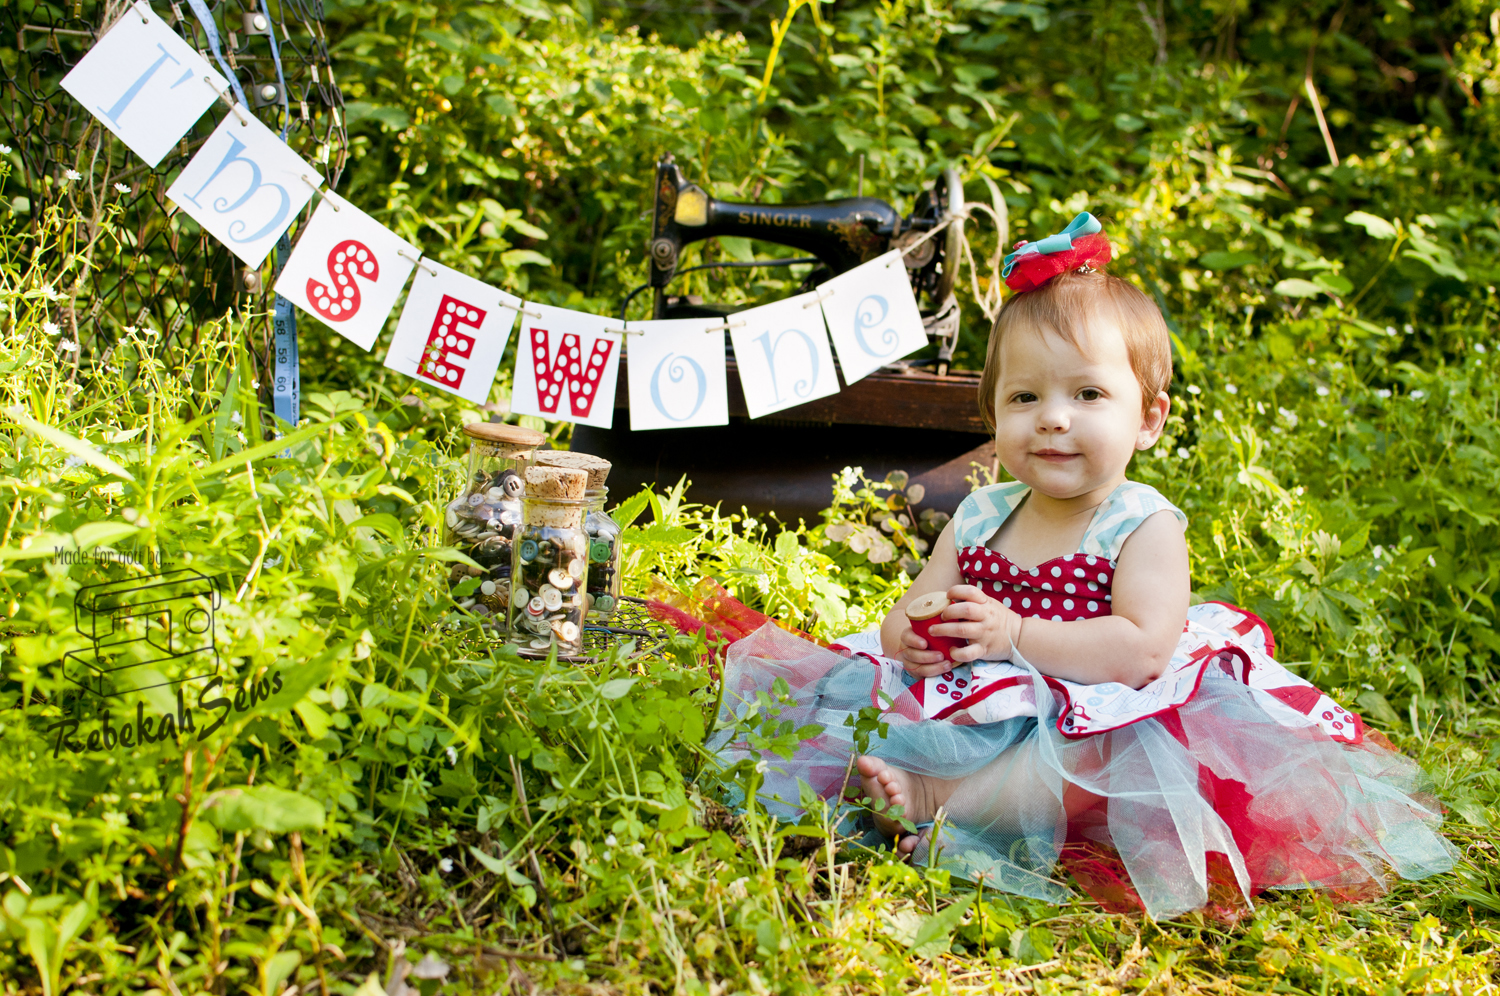
Now that Halloween has passed it is time to get ready for the other holidays to come! You know what that means…time to start those Holiday outfits. Do you realize that there are only 7 weeks till Christmas?? Yes, take a deep breath. You got this! I know I was so happy to be able to participate in this tour as it made me finish my baby girl’s Christmas dress on time! I couldn’t be happier with the results either. Just take a look at Kenzie’s Party Dress and Skirt by Everything Your Mama Made (EYMM) and you know you have yourself an amazing dress or skirt!

RTC_6251

Let’s take a look at this pattern shall we?RTC_6288 
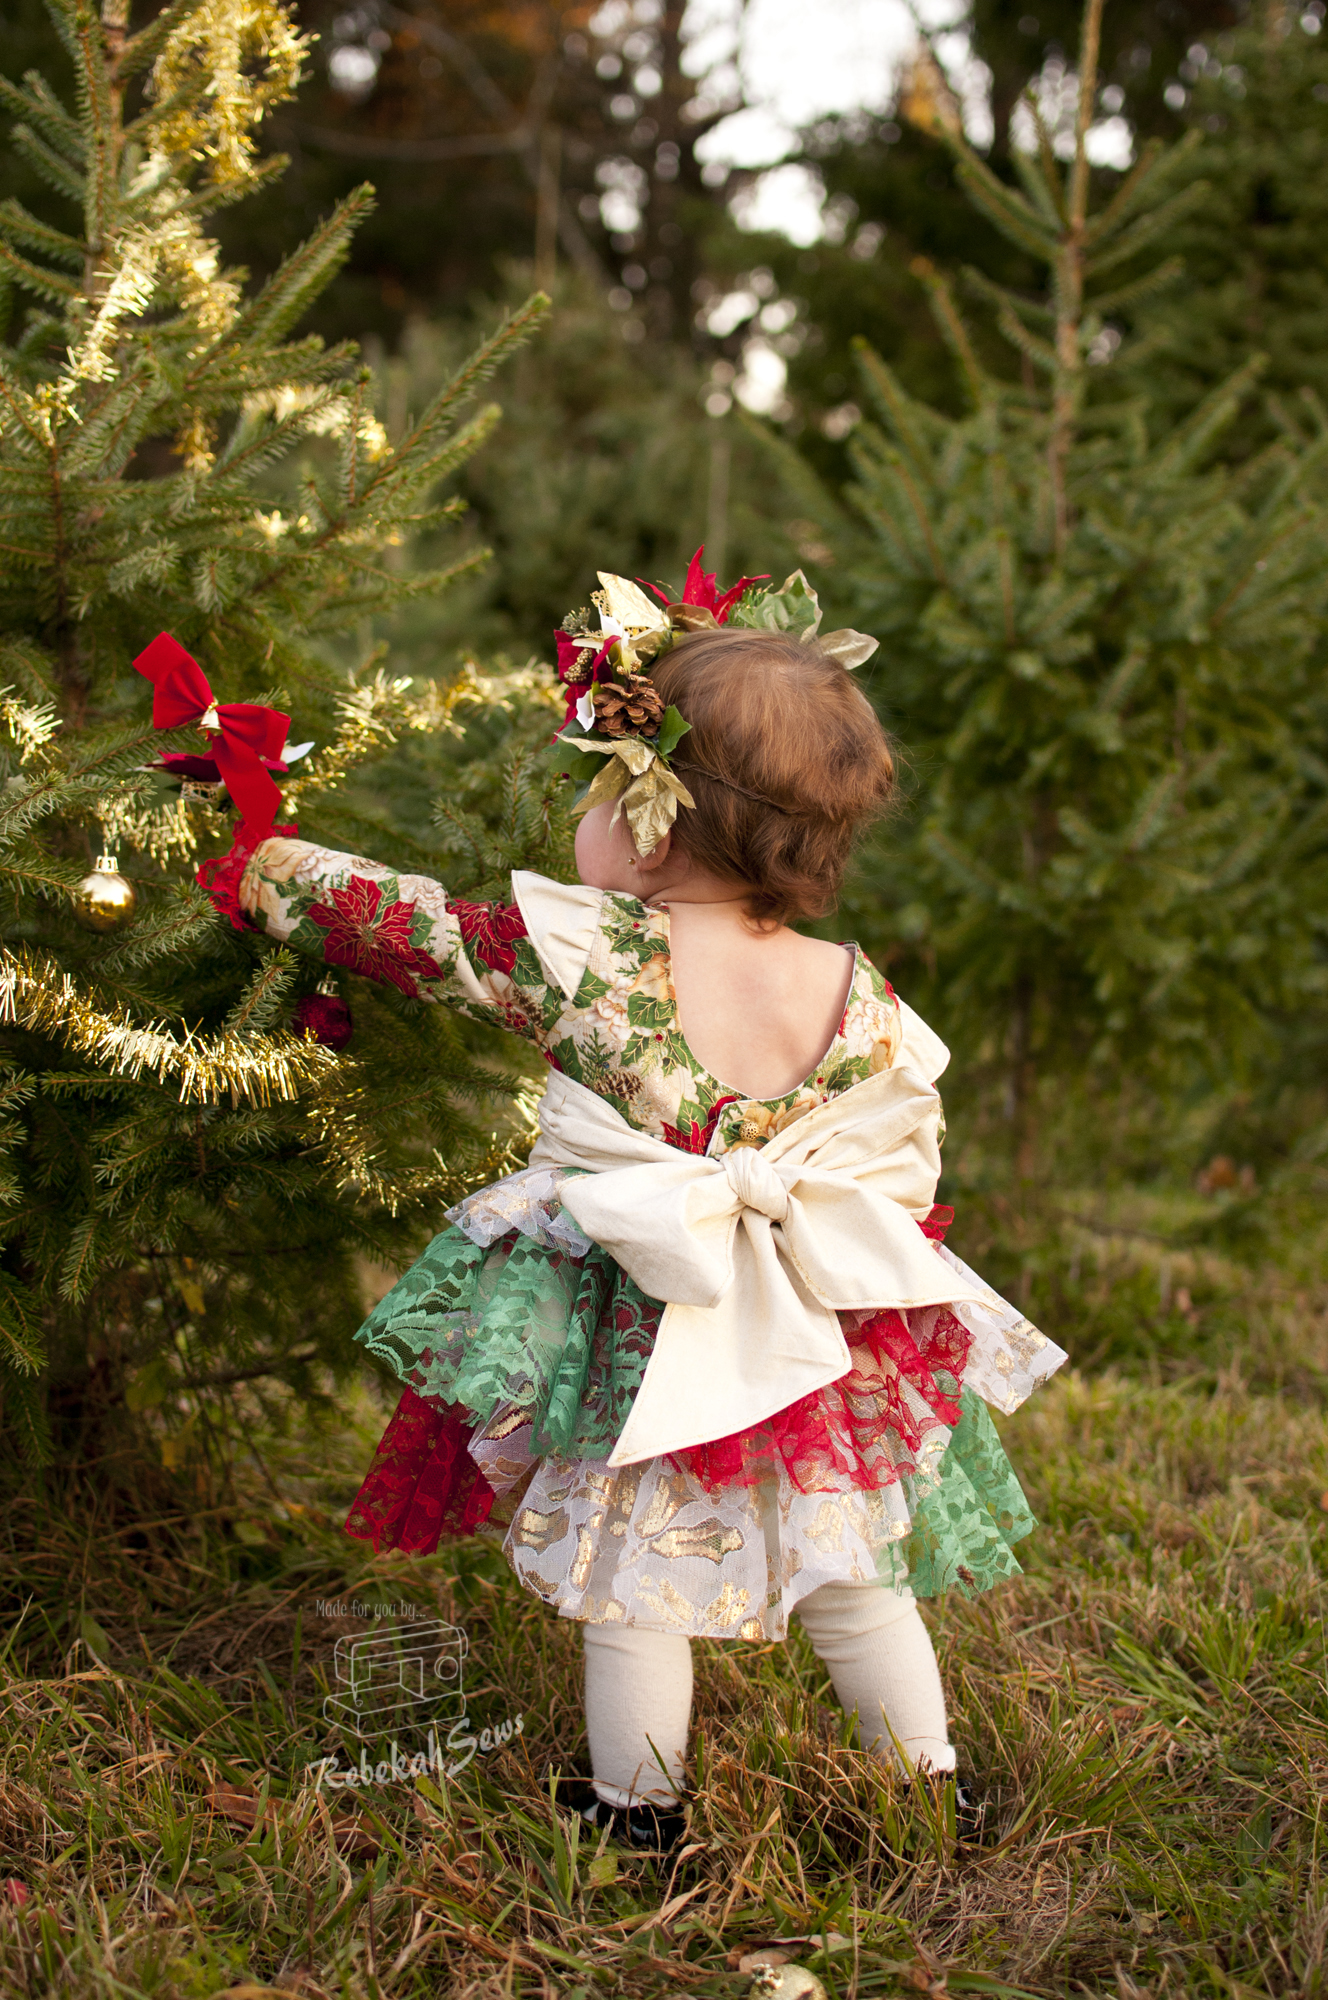
First off it comes in separated patterns for NB-4T, 5-18 tween, and a doll add on. Want all the sizes? You can get the bundle too at a discount! I just love that you can create so many different looks with this pattern. Included are options for the signature full layered skirt and a simple skirt, sleeveless or puff cap sleeve, and two different high waisted skirts. Did you take a look at the back? The scooped back is just so elegant. The bodice is fully lined for that professional finish too. There is also a sash that is full and beautiful. On either side of the sash there is a little gathering to create that full look.RTC_6344 The tutorial is put together very well in order to walk you through each step. That being said I would say this pattern is on the intermediate level but the advanced beginner would feel comfortable doing the simple skirt. One feature I particularly love is the planning guide to help you figure out fabric placement for the signature skirt. It made figuring out which fabric went where a breeze!

RTC_6216


RTC_6332

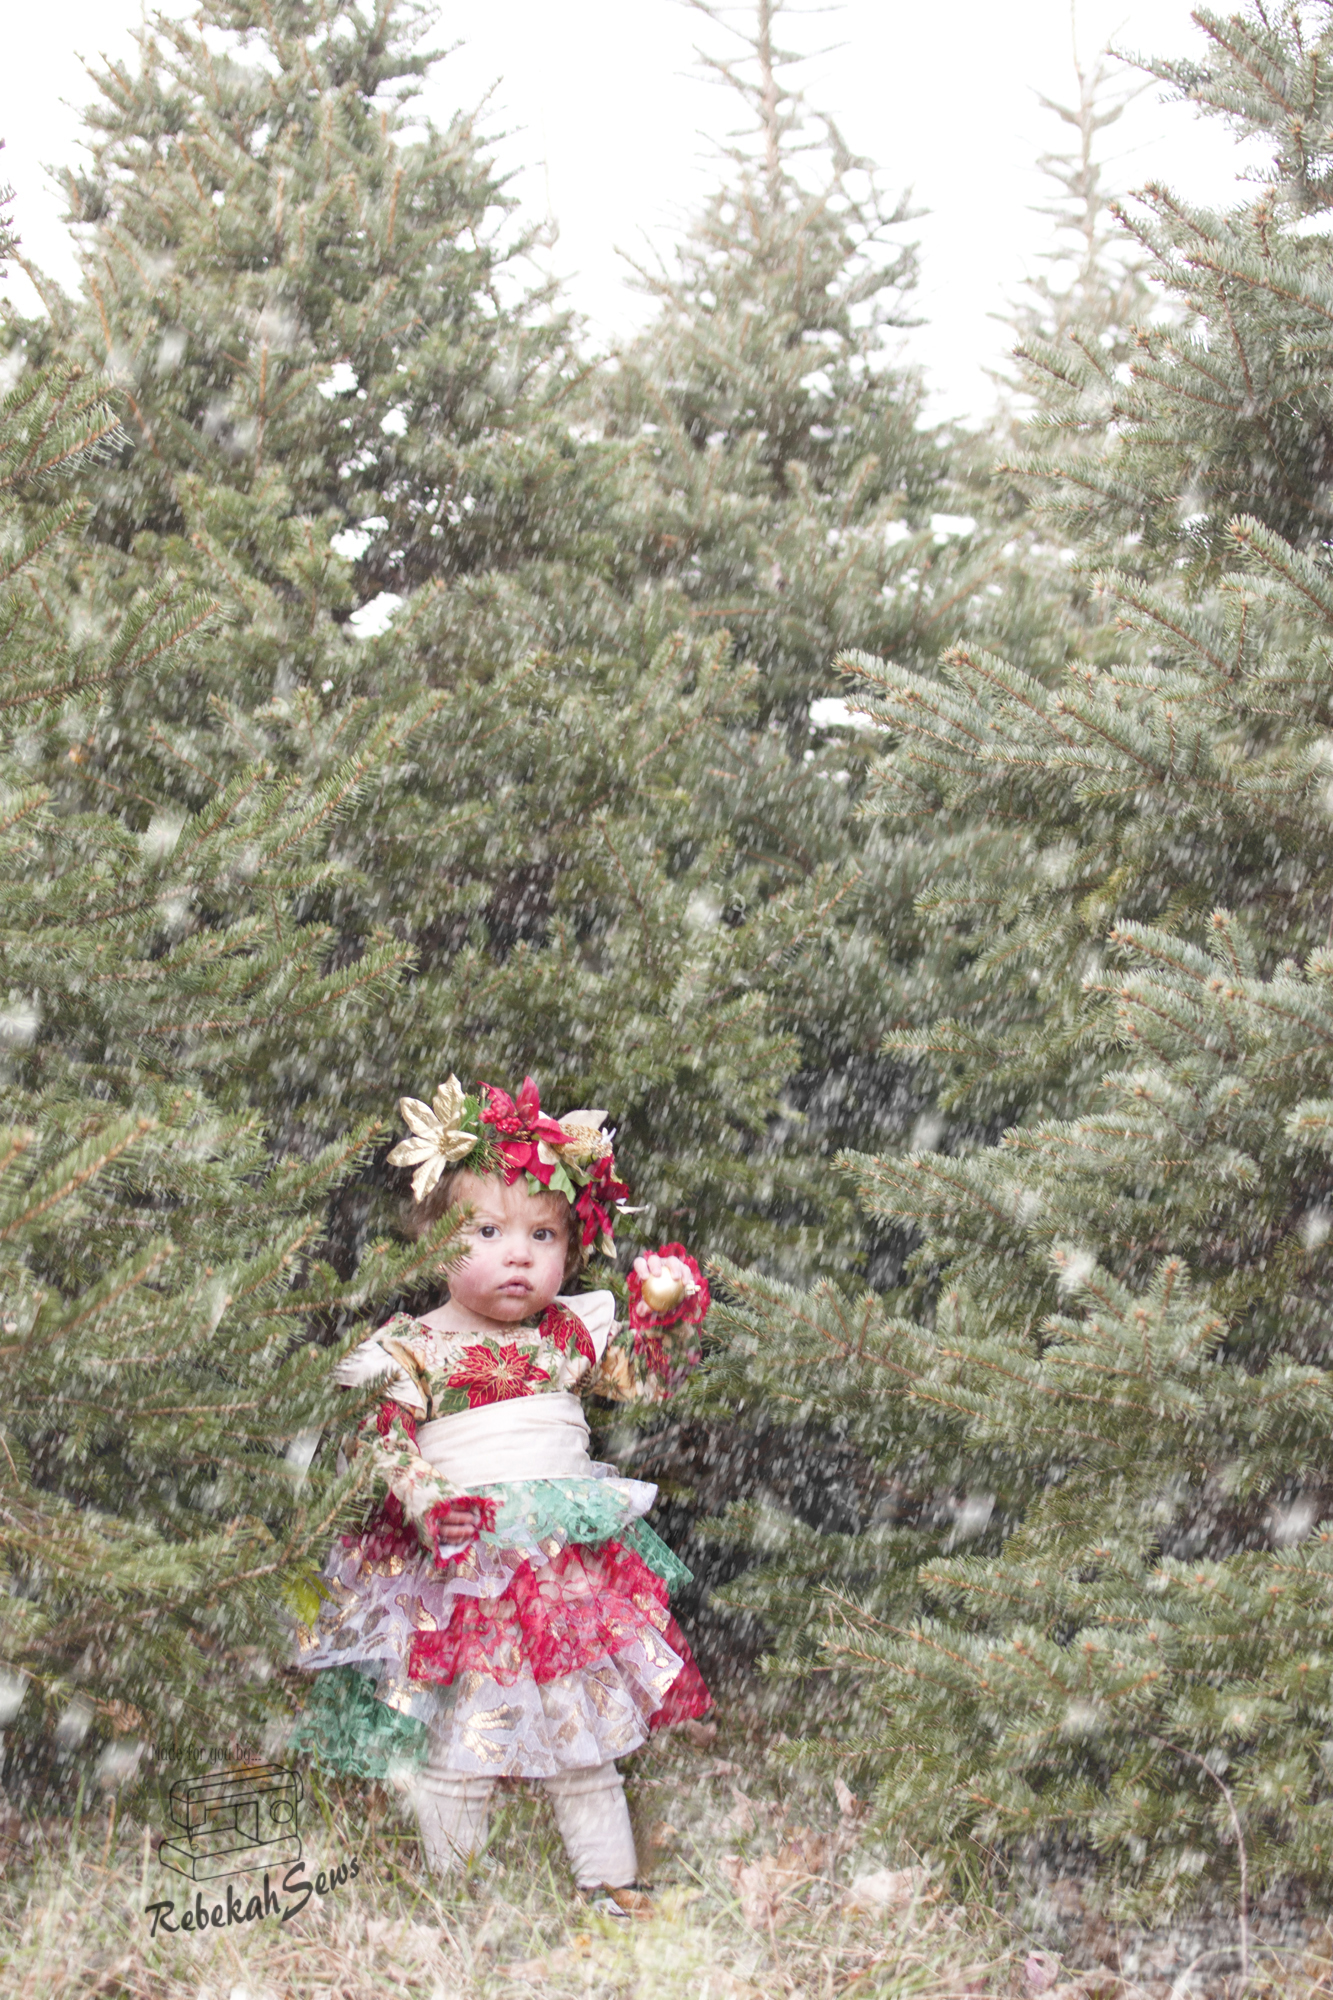
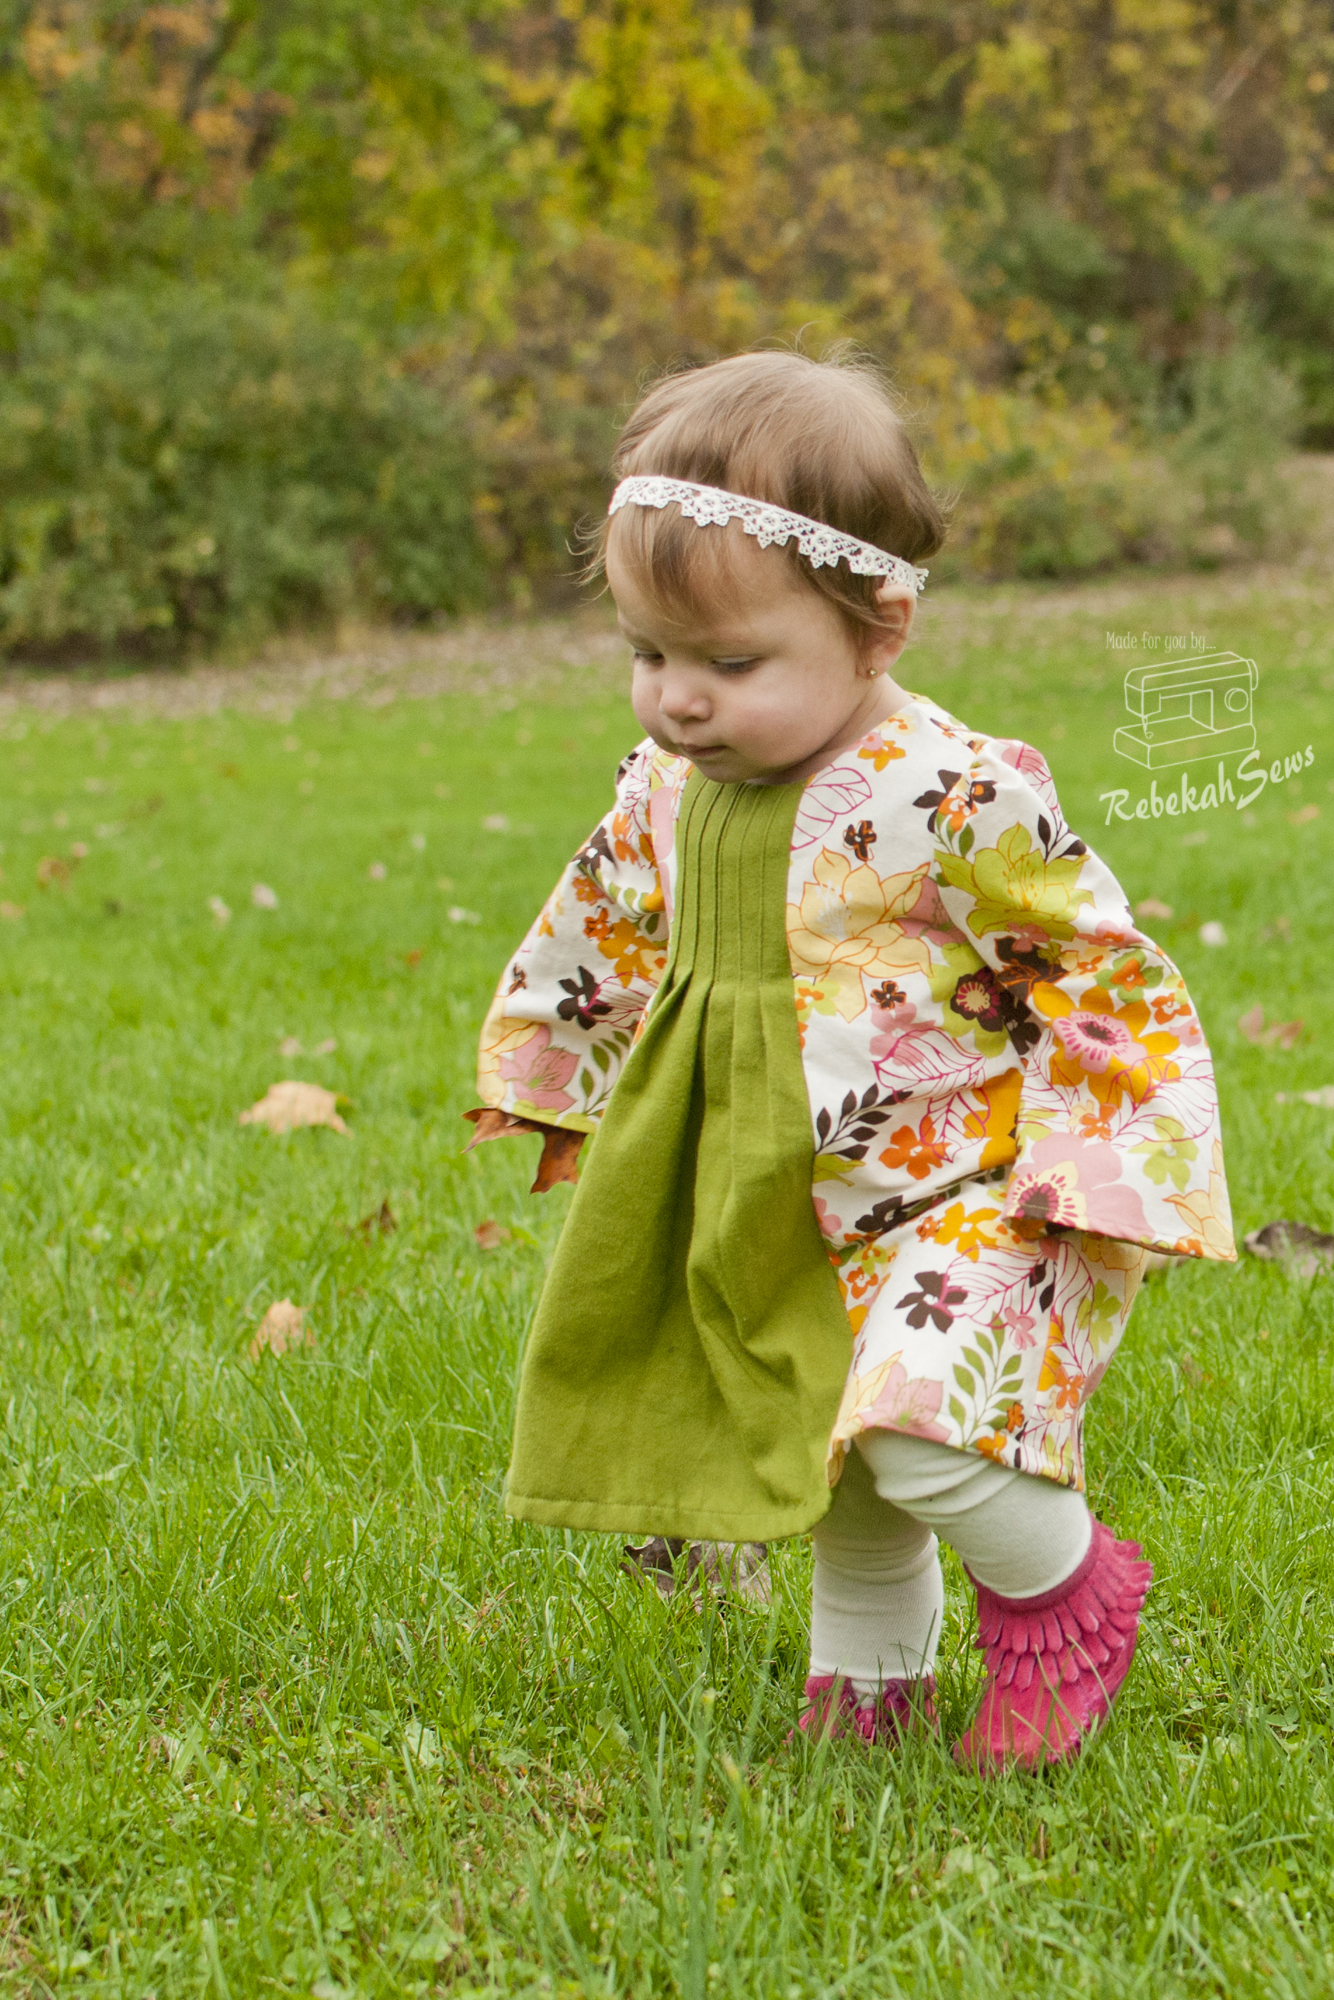
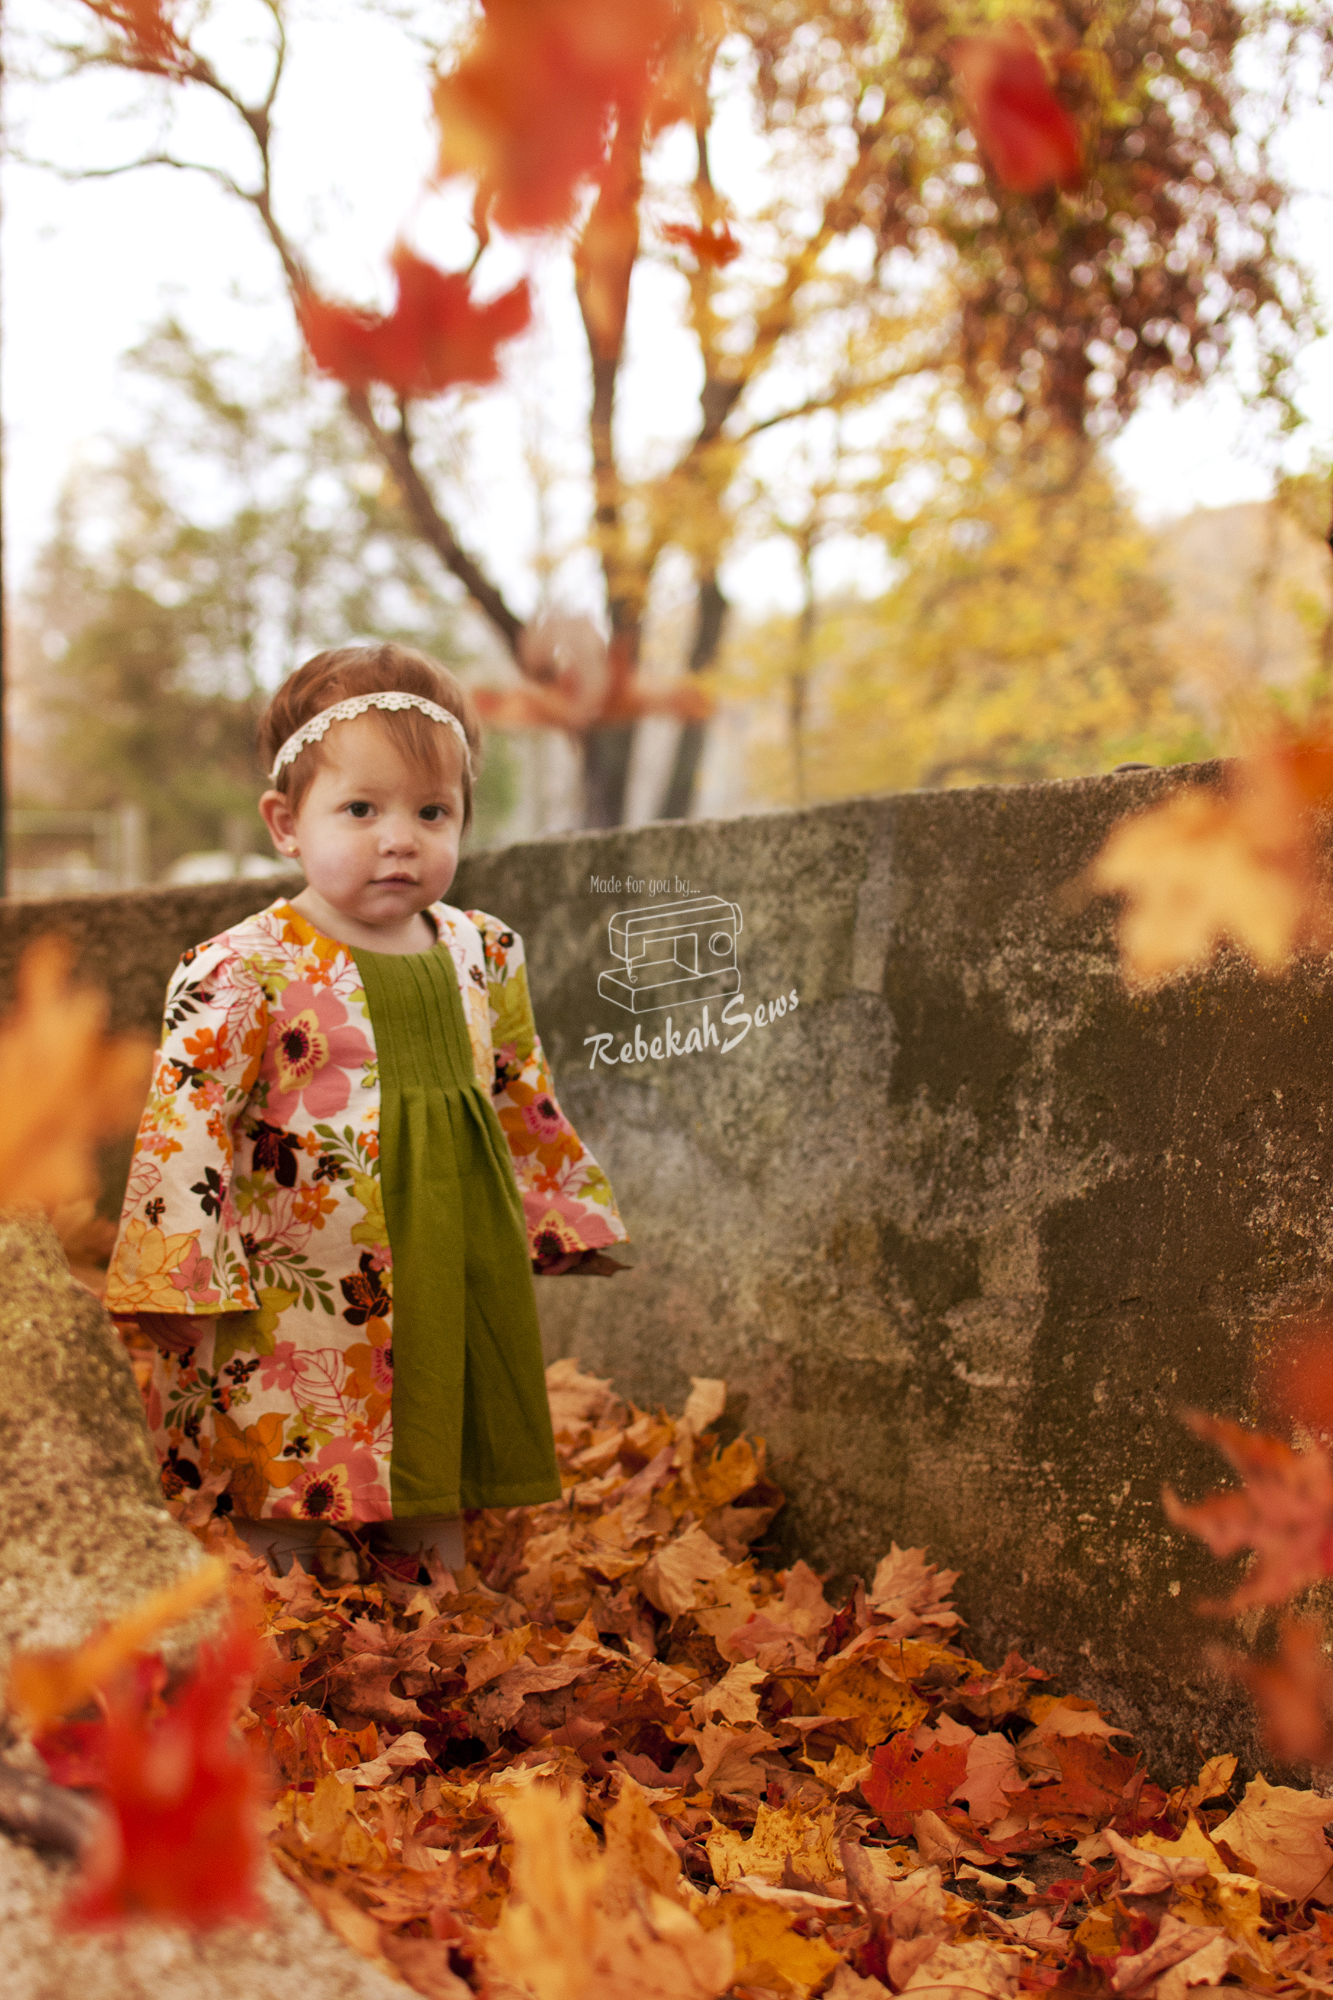
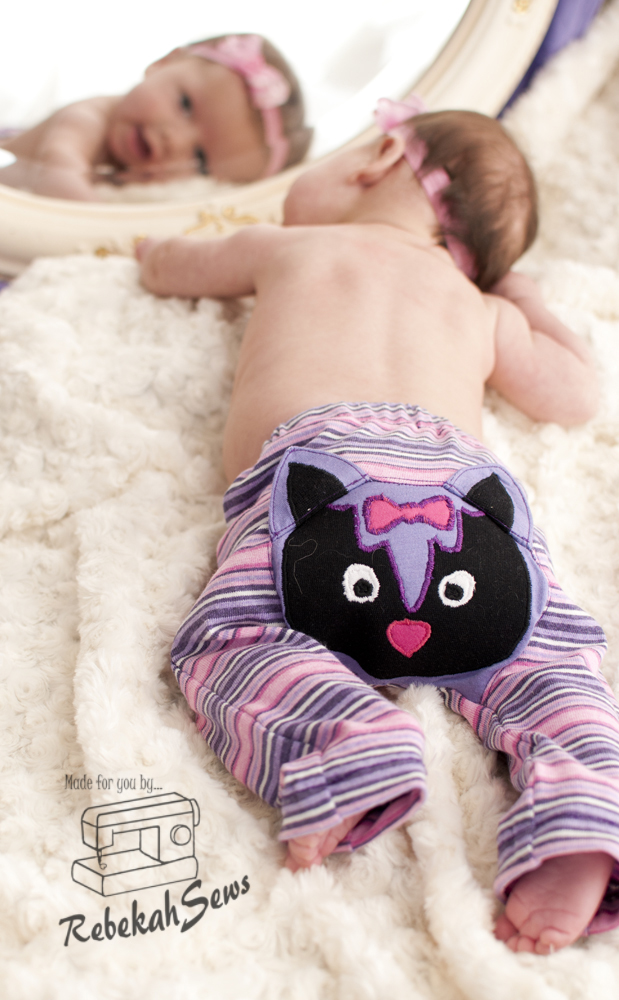
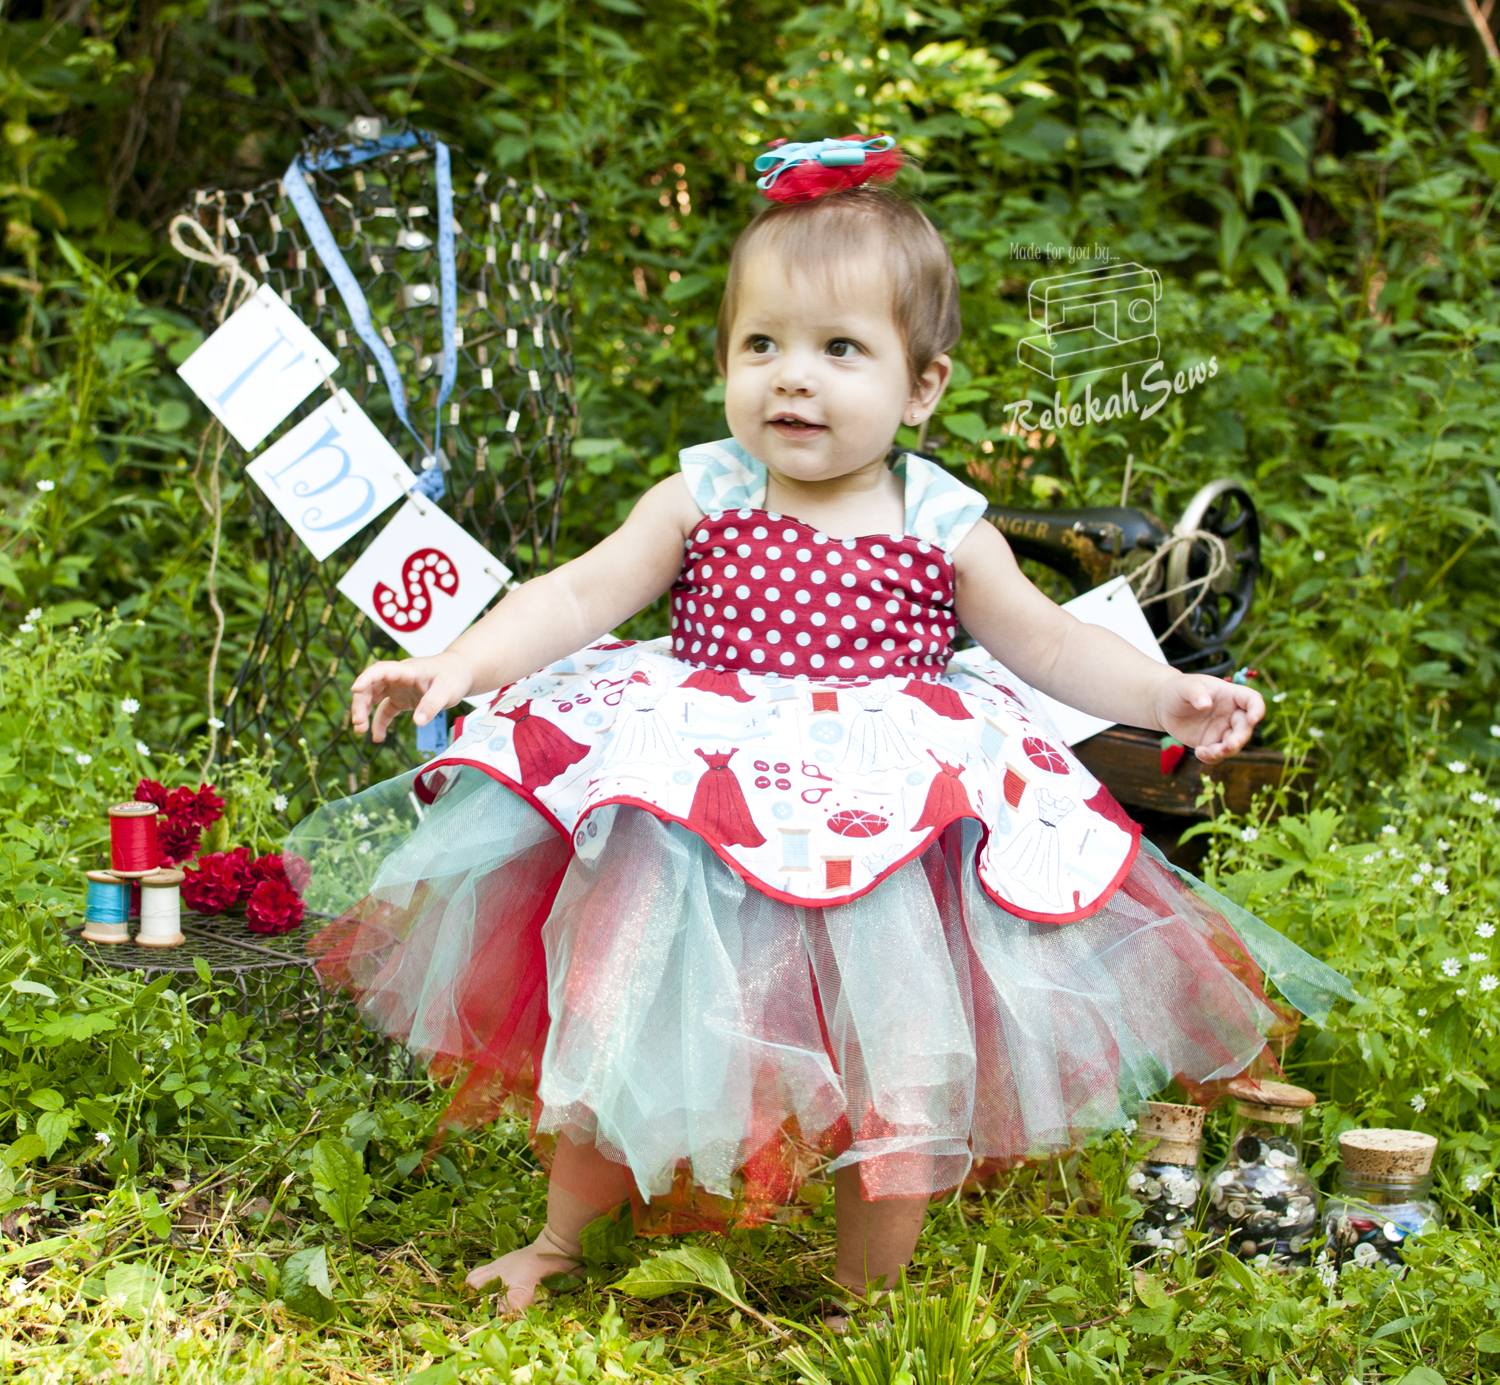
I just love lace for the holidays. RTC_6367
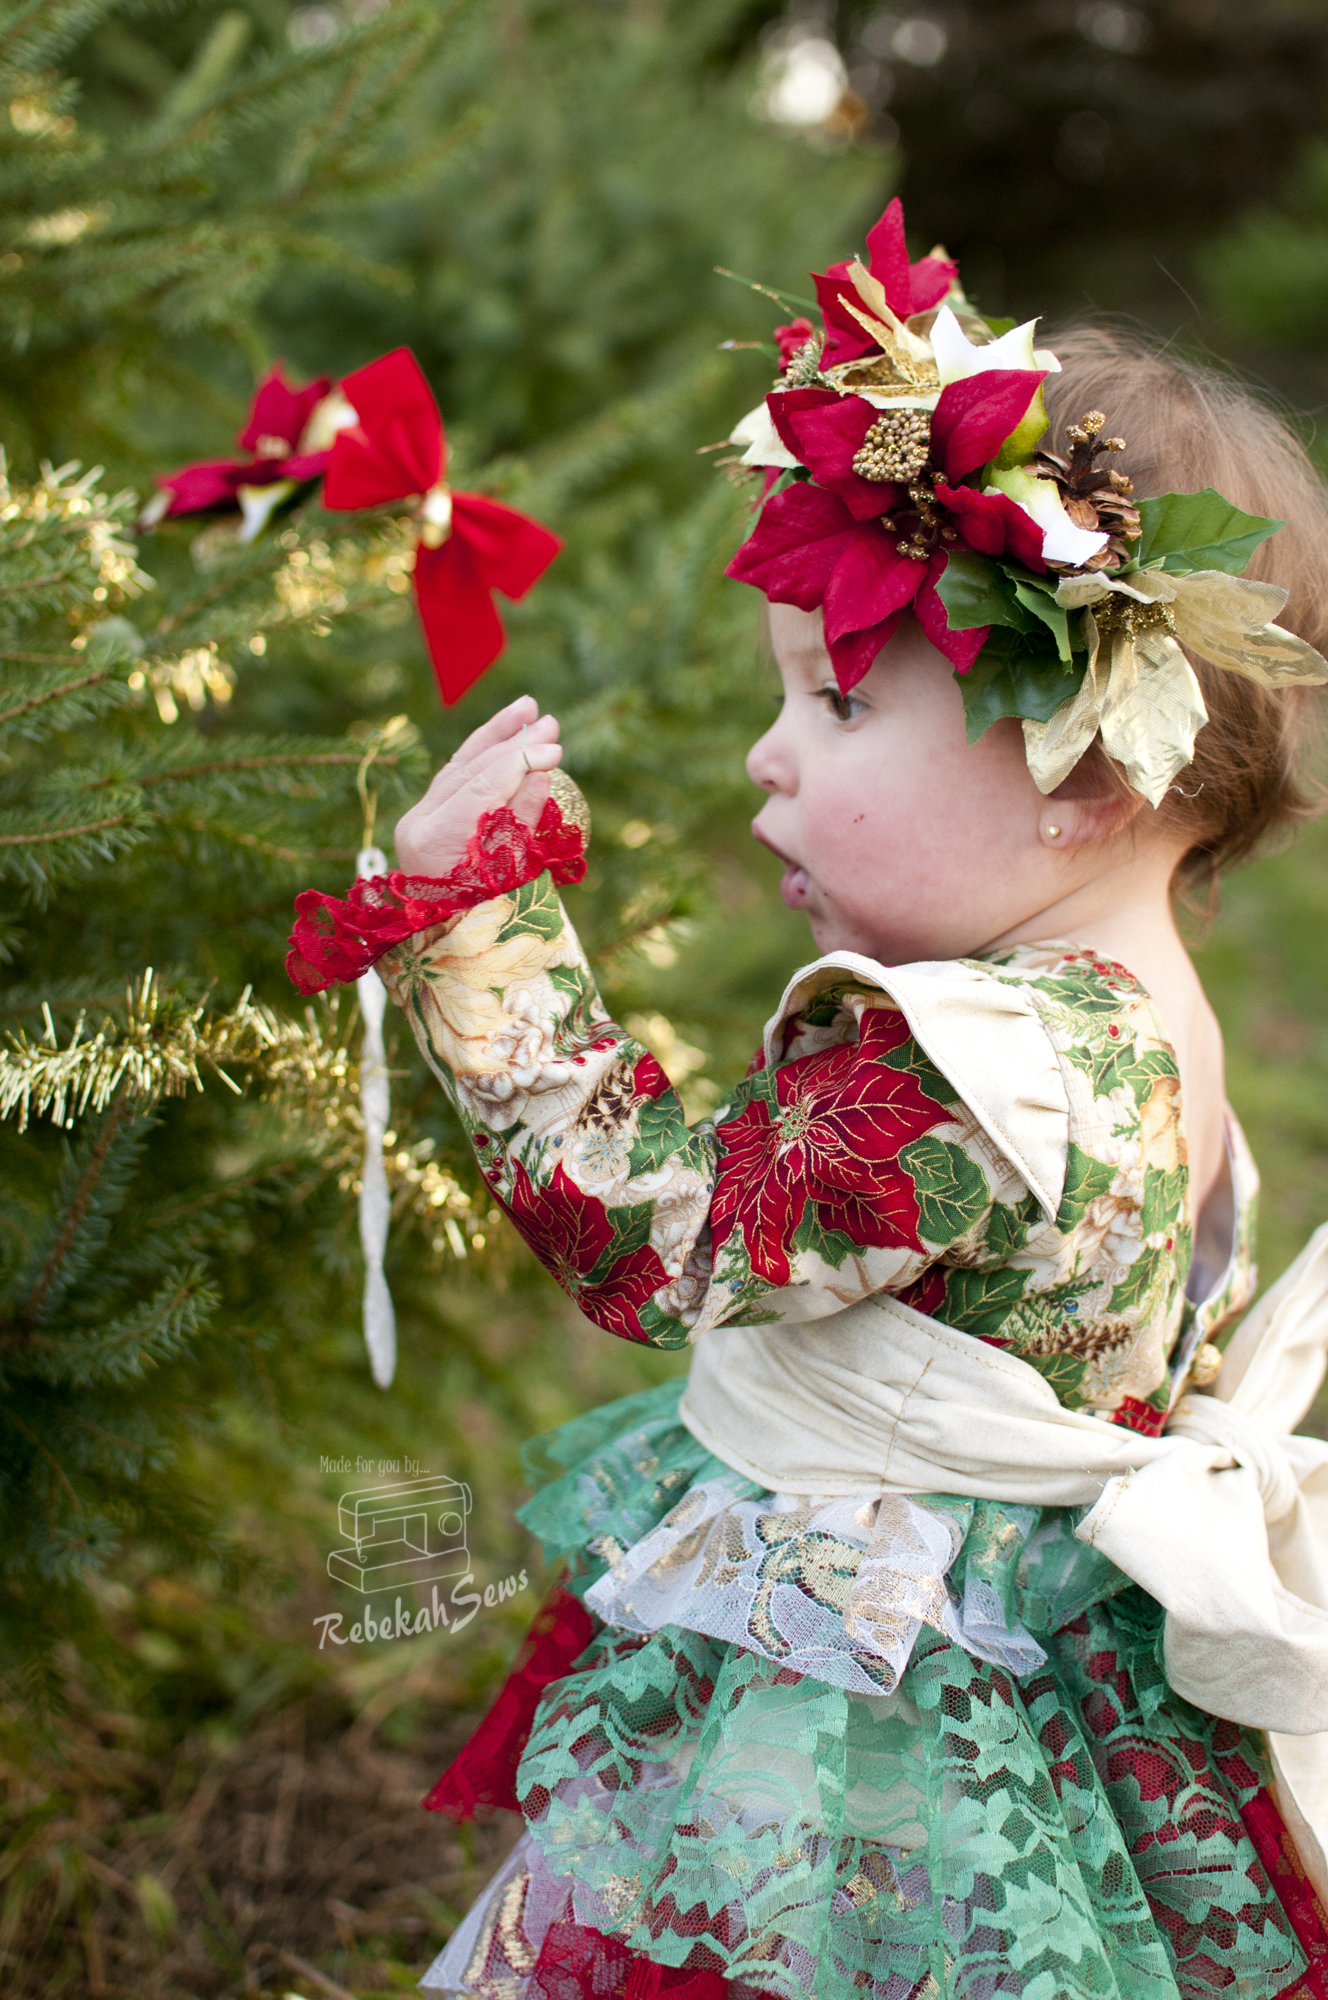
I knew that I wanted to make the signature skirt out of lace. Also one bonus for making the skirt in lace…I didn’t have to hem every flounce! Yay! I choose a size 9-12mo according to the measurements, however after cutting the skirt panels I knew that it would be a little tight in the rear area. I then re-cut with the length of the 9-12mo but the width of the 12-18mo. That worked out perfectly. Now, I prefer baby girl’s dresses to have sleeves as I don’t like covering up a beautiful dress with a sweater.RTC_6226 
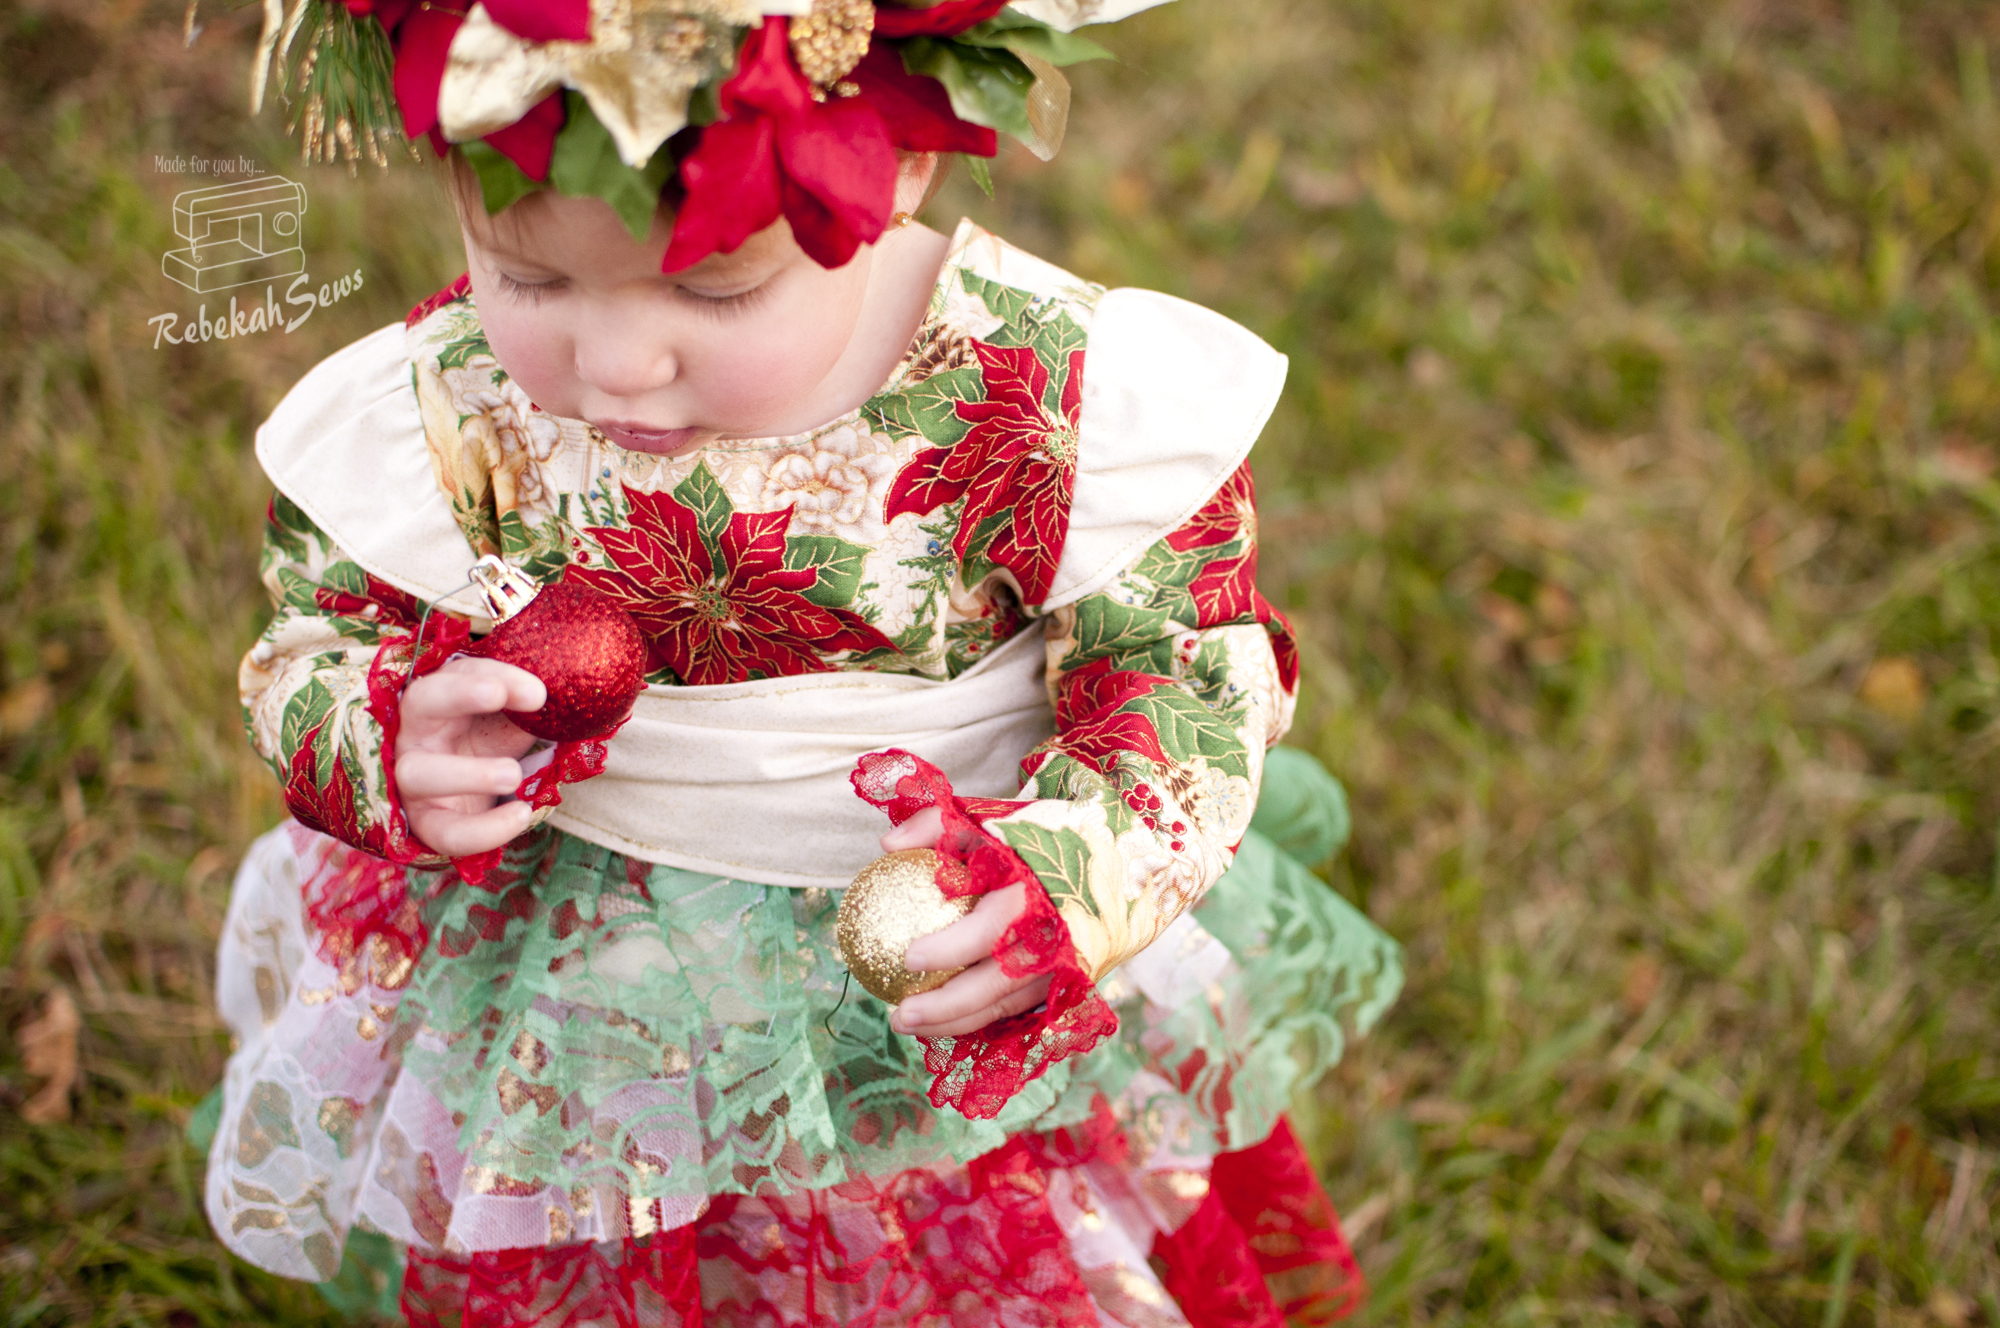
I just knew I had to try my hand at adding long sleeves to the dress along with the little cap sleeve too. They aren’t perfect as you can see but they work and will keep her a little warmer. I just love the finished dress. It came out just as I imagined!

RTC_6229

Want the pattern? Really, how could you not? Well head on over to the shop and grab your copy. Don’t forget to use coupon code LITTLELADY for 30% off until 11:59pm PST on 11/12/2014.

RTC_6318


RTC_6379

There is also a Rafflecopter giveaway with some awesome prizes! You could win a total of $125 worth of prizes that include a $50 EYMM gift certificate, Stitchbox Monthly November Sewing Box ($35 value), $25 EYMM gift certificate, and a Little Lady Sheet of Jamberry Juniors Nail Wraps ($15 retail). Don’t forget to link up your own amazing dress for even more chances to win! —> An InLinkz Link-up

RTC_6258
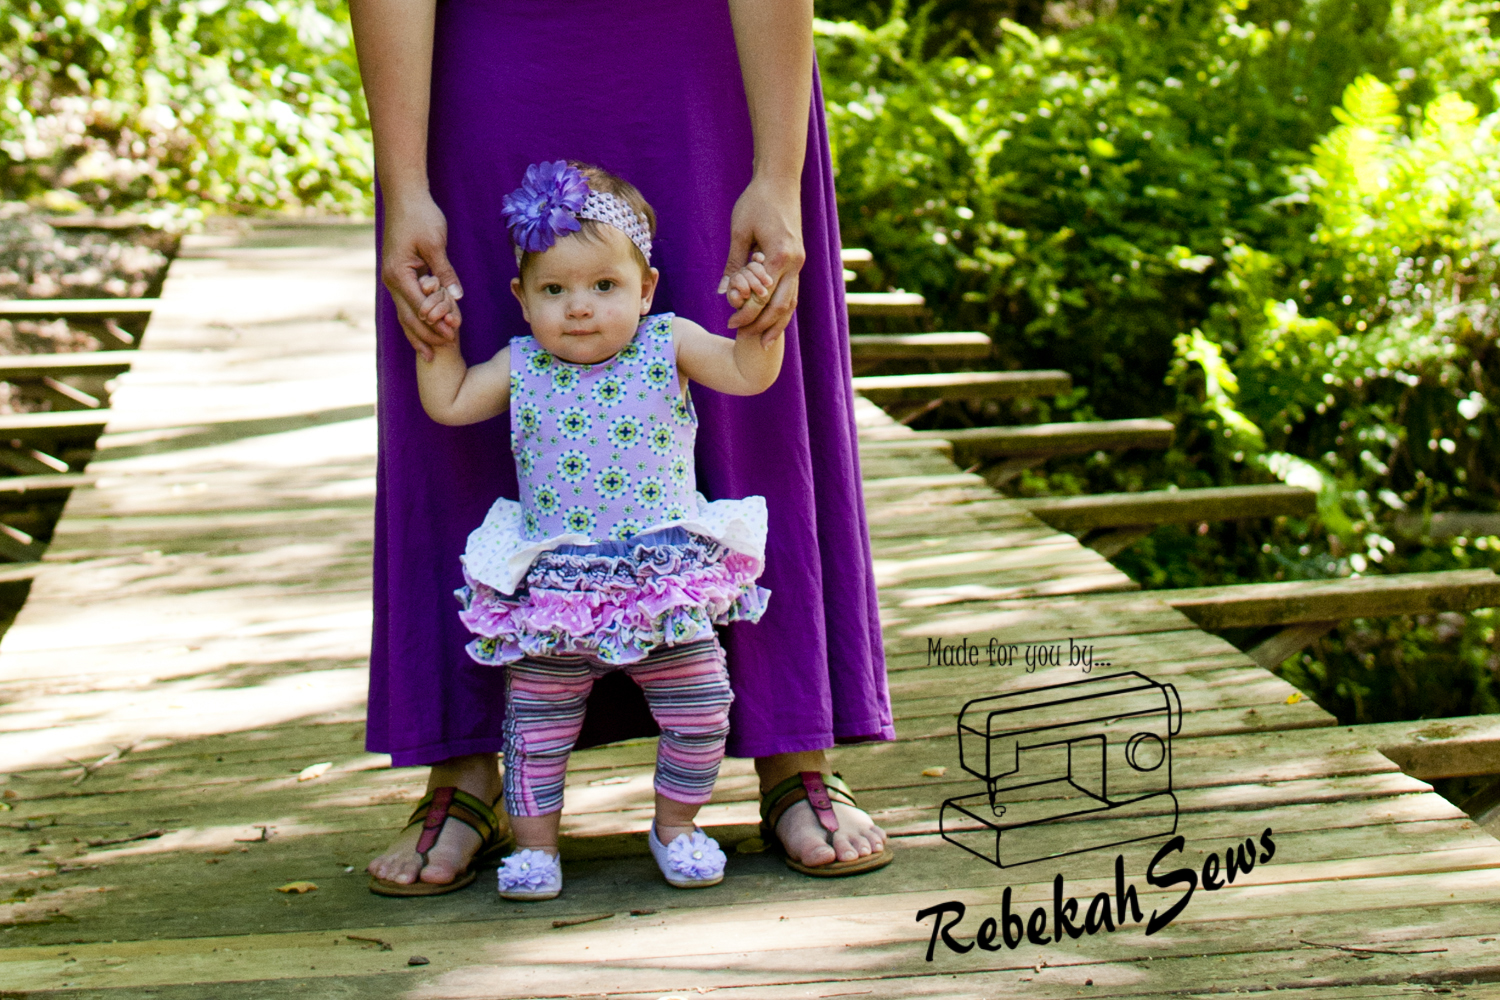
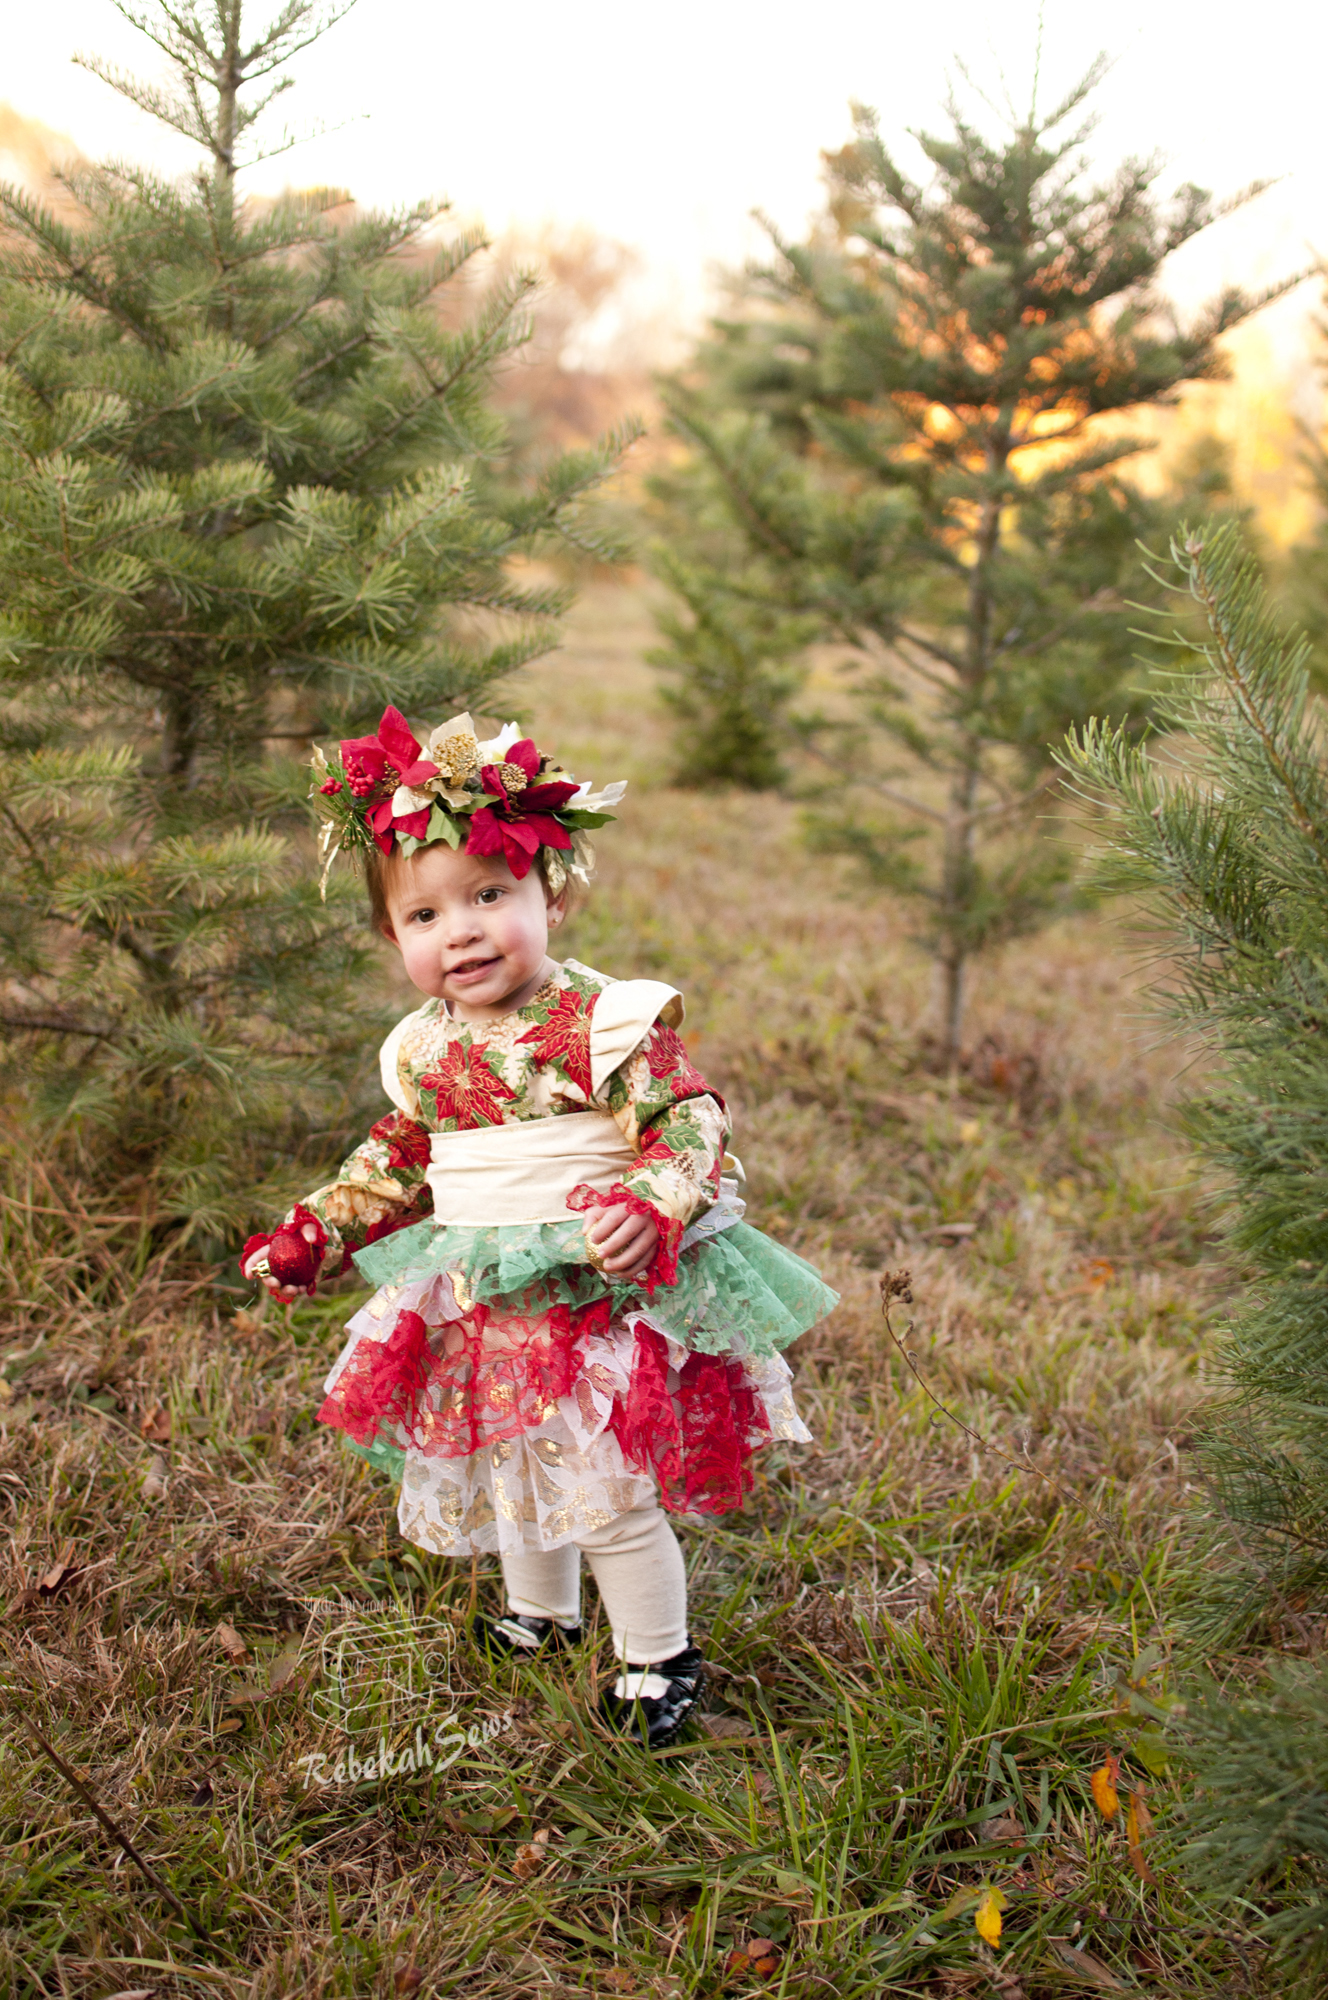
Dress it up or make it funky! This pattern is sure to make your little girl feel very special! Check out the other amazing skirts and dress on the tour for more inspiration!

RTC_6233

Let it Snow!  (So not ready for real snow but it sure does look pretty!)

RTC_6508


Touring the Ansley Top and Dress by Blaverry!!

AnsleyTourBanner 1

Lots of fun things happening this week! It’s doing to be a busy one. First thing on the agenda is the Ansley Top and Dress Tour for Blaverry Patterns! This is the very first pattern I have ever done by Blaverry. I just love the style of this top/dress. Before I go into exactly why, let’s first take a look at the nitty gritty of the pattern.

RTC_6034

The Ansley Top and Dress is a loose fitting, flowing, yet classic design. It comes in sizes 9mo-14yrs. What’s one of the best features? Well, the options of course! I think I counted like 15 different options to choose from. These options include collar type or no collar, different sleeve lengths including a 3/4 sleeve with or without a cuff, different hem options, and different top or dress options. Yes it is packed full! Other great features include a fully illustrated tutorial and layered sizing so you can print only the size you need. Yes, options are amazing!

RTC_6123


RTC_6109

Ready to hear exactly why I love this style? The silhouette. I love hi-lo tops, so the fact that this pattern included that option gave this girl a dreamy sigh. I just love the way it billows behind. RTC_6167For baby girls top I made a size 18mo. You should definitely go by measurements on this pattern. My girl typically wears a 9-12mo or 12mo size in most patterns however this pattern put her in a size 18mo as her chest size was a tad bigger than the chest measurement for 12mo. Because the pattern is roomy I could have gotten away with the 12mo but the 18mo certainly will last the winter. Since it is now colder here in New England the 3/4 sleeves where perfect along with the cuffs. My cuffs didn’t fit perfectly onto my sleeve. They didn’t go all the way around the sleeve and meet perfectly (there was about a 1.5cm gap) so I put a little pleat in the end so they met. RTC_6055Not a big deal, I think it just looks nicer that way. Now are you wondering about the band around the hem? That was my add on. I don’t know about the dress versions, but with the hi- lo version the shirt front is short. There was no access for a basic hem and I prefer no belly shirts, so my solution was a band around the hem. Now add one big button and you have the final touch to this shirt!

RTC_6106


RTC_6039

The end result is beautiful. I know I will definitely be making more and can’t wait to try the dress version too. I would rate this an advanced beginner to intermediate pattern as you have a placket and collar to sew. Don’t let that intimidate you too much though, as you have those options! You can make it without the collar if you’d like.

RTC_6077

RTC_6072

RTC_6097

RTC_6089

Ready to get your own copy? There is a special sale going on for the tour! Head on over to the Etsy shop and use coupon code ILOVEBLAVERRY10 for 10% off. Don’t forget to check out the other patterns as well. There are so many that are now on my list to buy!

RTC_6000

Don’t forget to check out the other stops on the tour!!

November 6th

November 7th

Enjoying Autumn with the Autumn Shelley by Felicity Patterns!


RTC_5849

Fall. I just love fall. So today in honor of the season we are taking a look at the Autumn Shelley by Felicity Patterns. Be ready for photo overload as we just had a great time on the photoshoot with this one. Baby girl just loves Fall, well really the leaves, too!

RTC_5765

Now this cute little patternRTC_5852 gives a classy yet vintage feel with many options. It comes in sizes 1-8yrs and the sizing is spot on! The options included are button closure (no button hole though!),RTC_5809 zipper closure, long sleeve, short sleeve, plain or decorative stitching pleats, and dress or shirt length. The pattern also goes through how to add lace to the neckline and long sleeves for an even fancier feel. The level of sewing on this pattern is advertised as intermediate and I think that is very true. With the pleating, edge stitching, facings and other features, you do need to have a good grasp on sewing prior to completing this pattern.

RTC_5737

In order to go through each option the pattern includes 3 tutorials. RTC_5727This is definitely one pattern you should read before you start sewing so you know what to expect. You may need to jump around the different tutorials in order to get the instructions on the options you chose. Yes it was a bit inconvenient, but there were many options to cover.RTC_5854 The way the pattern is written is a bit different than most patterns I have done. Some very important info like which seams are what seam allowance (pay special attention to these as they aren’t all the same), printing instructions, and sizing chart are all at the end of the tutorials rather than in the front.

RTC_5671

RTC_5922

You ready to hear a little about my version? RTC_5748 My girl is just getting into size 12mo clothes, so I made her a size 1. The fit is great! A little roomy, but again, that is because she is just getting into size 12mo. For fabric I chose a fall floral and accented it with a green flannel center panel. I decided to do just plain pleats with no decorative stitching as well. Now when sewing the center panel to the side panels make sure you pin from the hem up to the neckline. This will make them line up correctly. If you go from the neckline down, they will not line up and you will have to seam rip.RTC_5674 Just ask me how I know… Anyways, in the tutorial it calls for an elastic casing on the inside of the sleeve so that there is elastic around the wrist. I chose not to put the elastic in as I just love the bell sleeves, especially with the little shoulder poof that was created by the gathers. Just darling!

RTC_5838

The end result is just stunning. RTC_5994A simple elegance just radiates off this dress. Now that I have made one and have gotten used to the tutorial layout I could certainly make another in half the time. This really is a perfect little dress for autumn and even though I did have a little trouble with the tutorials, it was so worth it in the end!


RTC_5935_1


Guest Post over at GYCT!!

I can’t believe I forgot to post this yesterday.  I was a guest poster yesterday over on the Get Your Crap Together Blog.  She is hosting an awesome series called the 31 Days of Halloween.  This series features a post everyday in October featuring a great fall or Halloween craft/tutorial/idea. Head on over an check it out!  I had a little photography fun on my day!

Unicorn Spotting!! Halloween Hack Tour!

halloween  hacks banner

October 1st…The time when we all start thinking about what the heck we are going to do for Halloween. Of course our plans are quickly changed by the demands of our little humans. Then the head scratching starts as we try to figure, “How am I going to make that??” Well here to help us all out is an awesome blog tour hosted by Stephanie over at Swoodson Says! This is going to be a very fun event focusing on using non-costume PDF patterns to make Halloween costumes and/or accessories. I really can’t wait to see all the creativity myself!

RTC_4062-1

But first we interrupt this blog post for a very important message! There has been a UNICORN spotting in New England!! I even had the pleasure of observing this little magical creature in its natural habitat. Proof that unicorns do exist!

RTC_4091


RTC_4083

Ok, ok, yes I even got a little creative too!RTC_4042 I knew I wanted a sweatshirt and pant for this hack and I quickly settled on two awesome patterns by Little Kiwis Closet. RTC_3934The first pattern is the Peekaboo Pocket pants. This comes in sizes 0-5yrs. I just love the little pocket on these and the fit… just amazing!! The hoodie is the Street Smart Sweatshirt Collection. This collection comes in sizes NB-12yrs and has a ton of options! I wanted all embellishments to stay on the hoodie so I needed a longer hoodie. For that reason the hi-lo hem line on the Street Smart collection was perfect!


RTC_4084

RTC_3959

Now let’s look at the details shall we? RTC_3975I made both the pants and hoodie out of micro fleece. Perfect to keep baby girl warm while Trick or Treating on a cold October night. The mane and tail are also made of micro fleece cut into 1/2″ strips. RTC_3860The mane is the easiest to create as you place the pieces in-between the hood pieces when sewing it up. When you flip it right side out, it’s an instant mane! For the horn, it’s just a triangle filled with stuffing to get it into the shape of the cone. I did add the detail of the swirl around it for fun! I then added the horn to the hood using a ladder stitch (hand sewing stitch). I’m going to skip over to the tail real quick. For the tail it was again strips of 1/2″ micro fleece sewn into a bias like strip. I then made that strip into a circle and ladder stitched that to the back of the sweatshirt. Now for the ears. They are the trickiest part of the whole outfit!


RTC_3892

RTC_4026

Here is a quick and dirty tutorial for the ears. First you want to cut two pieces of your main fabric and two pieces of your contrast fabric in a shape like this: Take one of each piece and sew them right sides together. Turn and topstitch. Now fold your ear piece so that the inner ear is folded on itself.Untitled-1 You now sew a straight line across the folded ear parallel to the bottom of the ear. Depending on how big or little you want your ear make the parallel line closer to the top or the bottom of the ear. Below your line of stitching you now have a folded piece. You are going to cut a straight line right down the folded part so that both sides separate. RTC_3864Now take your ear to your hood and zig zag stitch around the square you just made at the bottom of the ear. That’s pretty much it! Clear as mud right? I would have done a picture tutorial but I forgot to take pictures when sewing! Oops.

RTC_3895

A little creativity goes a long way! I deffinately loved the challenge and most importantly baby girl loves it too! The fun doesn’t stop here though. There is also a giveaway. Time for a virtual Trick or Treating scavenger hunt. Donors and bloggers, myself included, have hidden an icon in a September post. Your job is to find the icon and fill out a Google form with the URL from where you found it. Enter the a Rafflecopter giveaway
and if you have the places correct you may win 1 of 3 awesome prize packs! The tour goes from October 1-15th so make sure you are keeping up to date. Here are all stops on the tour and a little bit more about the scavenger hunt:

Blog Tour!

Wednesday, October 1st: Rebekah Sews & Dog Under My Desk

Thursday, October 2nd: Friends Stitched Together & Sew Pandi

Friday, October 3rd: That’s What She Crafted & Everything Your Mama Made & More

Monday, October 6th: Shawnta Sews & Handmade Boy

Tuesday, October 7th: Muse of the Morning & Swoodson Says

Wednesday, October 8th: Call Ajaire & Sew McCool

Thursday, October 9th: Once Upon A Sewing Machine & imagine gnats

Friday, October 10th: The Sewing Geek & Feather’s Flights

Monday, October 13th: Get Your Crap Together & Needle and Ted

Tuesday, October 14th: The Shaffer Sisters & The Inspired Wren

Wednesday, October 15th: Pattern Revolution & Just Joshin

Scavenger Hunt!

Time to go trick or treating! Use the Rafflecopter below for a digital scavenger hunt. You’ll be looking at each blog’s posts for the month of September to find this icon:

for a chance to win one of THREE awesome sewing prize packs! Three winners will be chosen randomly (and their form completion verified) and emailed within 3 days of the hunt’s closure.

A big thank you to all the sponsors who donated prizes!

Pack 1 { $30 to The Ribbon Retreat +2 patterns from GYCT Designs + 1 pattern from Dog Under My Desk}

Pack 2 {$30 to The Fabric Fairy + Kids Pattern Package from imagine gnats}

Pack 3 {$30 to Fat Quarter Shop + 2 patterns from Everything Your Mama Made & More +Ramblin’ Raglan Mega Pattern Pack from Muse of the Morning}


 Even Unicorns have bad hair days…

RTC_3953

Stitchwerx Designs Traveler’s Cape…Boy Style!

RTC_3487_1

It’s that time of year again! The time where you don’t need an excuse to dress up. Where the kiddos are demanding to be their favorite character from this year’s most popular box office hit. And I am sure you know the most popular one right now. By now you have seen a million different patterns for Elsa’s dress and even Anna’s dresses as well. However there is one that is not wide seen just yet. Anna’s cape. However this pattern is not just for a Princess Anna cape, nor is it just for the girls. This one’s for the boys too!

RTC_3564


RTC_3471

Has your interest been peaked yet? Well let me tell you about it! Stitchwerx Designs recently released their Traveler’s Cape and Joyce Ann Bonnet. Two amazing patterns that can transform any girl into a princess that can handle the cold! These two patterns aren’t limited to princesses though. They can be used for reenactment, Halloween, dress up, you name it! I know my little girl will be getting a set for Christmas photos this year. Can you imagine a Christmas plaid or even solids with a backdrop of snow…beautiful!! Unfortunately I didn’t have enough time to make her set now, but if you head on over to the listing you can see so many amazing photos of the bonnet. They really tell it all!

RTC_3571

RTC_3579

RTC_3441

I really wanted to switch it up a bit and see what the Traveler cape could do beyond the typical Anna’s cape. This is where the boy sewing comes into play!! I won’t be limited to just Princesses.RTC_3460 Let the boys have some fun! Wizards, super heroes, magicians, detectives…anything really! Whether it be for Halloween or imaginative play, you can’t go wrong. The traveler cape comes in five sizes 12/18M to 8/10Yrs. This is fully lined with not exposed seams at all. The shoulders are fitted in order for the lay to be just right. It is perfect for a beginner too as the tutorial walks you through every step. What I love about this too is that you can make just the longer cape, the capelet, or both! Let your imagination soar with this. As you can see my son certainly had a LOT of fun with this.

RTC_3555


RTC_3617

For his cape I decided to go two tone for a little more fun.  Now in the pattern Kim gives a page of different closures. I decided not to choose any of them and instead made mine into snaps!  I used two taps instead of one and made them slightly adjustable too.

RTC_3438

RTC_3626

When Stitchwerx Designs and Mandy K Designs recently teamed up for a Frozen inspired giveaway, magic was in the air! While the giveaway is over with, the sale is still running strong! You can get the bundle of the Cape and Bonnet by Stitchwerx for only $10. And if your little princess is begging you to be Anna or Elsa then pick up the Princess Party dress by Mandy K too! It’s on sale for $5. Both sales last till September 30th so make sure you get it before the October.

RTC_3549

RTC_3429_1


Tinley Tee and Love Me Knot Tour with GYCT!!

RTC_1804

Time for another tour! I told you there were lots of exciting things happening. Today we are taking a look at two awesome and versatile patterns by Get Your Crap Together Designs. The name just always cracks me up! I love it. These two patterns are great paired together or with other patterns. Add that they are both quick and easy sews not to mention cute and it’s like adding icing on the cake. First I am going to tell you a bit about each pattern and then I will tell you all about my little girl’s outfit I made using these patterns. I had fun with these!

RTC_2030

So let’s take a look at the first pattern shall we? The Tinley Tee comes in sizes 12mo-12yrs. RTC_1951Included are 4 sleeve options (flutter, gathered cap, short and long sleeves) and 2 hem options (regular or banded). Chelsea does a great job on the tutorial with all the photos and step by step instructions. Truly a beginner could do this! Because of all the options this is a staple for any girls wardrobe no mater the season. The tutorial even includes instructions on how to layer the sleeves for even more fun!

RTC_1815


Can’t have a top without a bottom to pair it with! And what would be better than the Love Me Knot shorts.RTC_1946 These are just super cute shorts. I have actually made 3 all at different times, but it goes to show you that it’s so cool I keep coming back to it. Sizes range from 6mo-12yrs. These are bubble style shorts that are hemmed with bias tape. Featured on the side is a little keyhole with ties to tie into a bow. There are also optional gathered pockets! The waistband is a flat front waistband with elastic in the back which makes it easy for a customized fit. Everyone can have a little love with these as they are perfect for a beginner or advanced seamstress.

RTC_1781

As summer is ending and fall is fast approaching I thought I would use this tour as an opportunity to start on a fall/winter wardrobe for my little girl. For the Tinley Tee I decided to upcycle an old sweater of mine into a new sweater for her.RTC_1962 Now I should start by saying that baby girl is technically still in a size 6-9mo. That being said I still decided to stick with the size 12mo in hopes that by the cold months she would grow into it. Secondly I have never upcycled a sweater before and after completion realized that it is (at least mine) was a lot stretchier than regular knit fabrics. Result: a really cute super comfy oversized sweater for baby girl! In order to keep the original hems on the sleeves I just cut off a 1/2″ to the bottom of the pattern piece. For the hem of the shirt I didn’t cut off the hem allowance as I wanted it a bit longer. Also for the neckline I used the original collar on the sweater. RTC_1877It’s not as stretchy as normal knit so I had to lengthen the neck binding. This gave it a more open neckline which will look super cute with a turtle neck under it for the really cold months! Despite it being on the bigger side and needing to roll the sleeves a bit, I just love it! If the original sweater had been as comfortable as this sweater looks on baby girl I wouldn’t have upcycled it!

RTC_1988

Now for the Love Me Knot Shorts. As you can tell by the photos (we had a fun nature walk can you tell?) I made them into pants! How did I do this? RTC_1759On the pattern piece right above the keyhole extending over to right below the inseam curve I drew a straight line and cut. I then added paper under that line to extend the leg. Once I added the amount I needed to be long enough for baby girl I attached the bottom of the original pattern piece (the keyhole) to the added paper. My one mistake was then tapering the leg. I totally forgot I needed to leave the wide width of the pant leg in order to gather it before hemming it with the binding. So my hems have no gathering. Still look so cute though. I also didn’t add any pockets as I prefer no pockets for babies as they don’t use them. RTC_1772I know they are cute, but that’s just a personal preference. Also the pattern calls for 1/2″ bias tape. I like to use 1/4″. It can be a little trickier to attach but in the end it looks daintier. I will be making more of these for the colder months!

RTC_1971

Isn’t it amazing what you can do with these two patterns? Different fabrics, different options, different looks every time! Know what’s even better? You can enter win both patterns! Just click on: a Rafflecopter giveaway to enter. If you don’t want to wait, and I can totally understand your impatience, then head on over to the Etsy shop and buy them both. Use coupon code “SAVE15” to get 15% off. Don’t forget to take a look at her other patterns too! They are all amazing!

RTC_2007

Image Map


Sailing Away with Perfect Pattern Parcel #4!

Pattern Parcel #4Ready for more boy sewing?? It’s time for the Perfect Pattern Parcel #4 and it’s for the boys! Don’t worry, girls will enjoy it too. I must say I am very excited to be a part of this tour especially because in the parcel there was a non clothing option for the boys! First a little about the Perfect Pattern Parcel though.

RTC_1662

Did you know that part of the sales goes into helping educational equality? Yup that’s right. All profits after the costs of the sale go directly into charity. So not only do you get to pick your own price for all the patterns (as low as $15 for all 5 patterns or spend $26 and get a bonus pattern!) but you are helping a worthy cause. If that isn’t enough reason to buy more amazing patterns than I don’t know what is!!

RTC_1670

RTC_1695

Now for my tour date I decided to sew up the Jet Pack Bag by Betz White. I wanted to sew more than just clothes as I am stuck in my very well padded comfort zone. So in order to do that I needed to sew something I don’t normally do: bags, and sew something I don’t really like: zippers. Besides one little man was much bummed as he was going to use a hand-me-down backpack for Pre-K and he really wanted a new one instead! Well mama to the rescue. He was extremely happy with the results and even hugged the backpack! But I digress. I am sure you want to hear more about the actual backpack don’t you?

RTC_1715

RTC_1691

It is a good size without being overly big.RTC_1718 The dimensions are 12″W x 14″H x 3″D. This is designed to use medium weight wovens; I used home decor fabric on mine. I really like the vertical format which gives it enough room for folders, notebooks, and a binder or two. There are two pockets on the inside and two on the outside as well. The best feature though is the fact that it can convert from a back pack to a shoulder/messenger bag with just a couple clicks of the swivel hooks! RTC_1756This is rated an intermediate pattern mainly because of all the pieces and that you have to fuse either interfacing or fusible fleece to every pattern piece. There is also some hand sewing in this pattern but there is a reference in the beginning on how to do the different hand stitches. Great right?!

RTC_1747

I will admit I am a HUGE procrastinator. Because of this fact I had to get a little creative with my bag.RTC_1729 I waited till the last minute to buy all the hardware I needed for the bag. Laughing yet? Well, it may come to no surprise to many of you that Joann’s didn’t carry everything I needed. So instead of swivel hooks I used D rings and carabiners or what I call parachute hooks. Then I also had to repurpose a bar slide off an old bag that I found at Goodwill. Lesson learned: order ahead. Now the tutorial is fairly easy to understand. It is different from the tutorials I am used to in that not every step had a diagram. I found this to still be fine though as there was always a diagram when I needed it.RTC_1738 I did have an issue when attaching my lining around my zipper onto the main bag, but this was more the user and not the pattern. This is because you have to use a ladder stitch to do this. Perhaps it was just too late at night and my brain turned off but I couldn’t for the life of me get my stitches right. So instead I used some fusible tape and fused by zipper lining to the zipper instead. RTC_1658Be careful if using a plastic zipper though. Yes I melted mine a little. Fortunately it didn’t hurt the functionality of the zipper. Phew! The only change I made to the pattern was I used Velcro to close the front pocket flap instead of hardware. I figured this would be easier for my little man! Worked like a charm and I even added a decorative vintage button to the flap! Isn’t it divine??

(Shhh…You found it!!)

SCAVENGER HUNT BUTTON

Halloween Hack Scavenger Hunt!


RTC_1695

Want to get your own now? Head on over and get your parcel! You really can’t go wrong with any of the patterns. I am so looking forward to sewing up more items with the other patterns. And I know you will love it as much as I do!!

RTC_1688


Parcel #4 Inspiration Tour Schedule:

Friday, August 22

casa crafty ||

Lulu & Celeste ||

Keep Calm and Carrion

Saturday, August 23

Max California ||

Amanda Rose


Sunday, August 24

little betty sews


Monday, August 25

Kadiddlehopper ||

Radiant Home Studio

Tuesday, August 26

La Pantigana ||

Boy, Oh Boy, Oh Boy Crafts ||

Friends Stitched Together

Wednesday, August 27

Make It Perfect ||

Modern Handmade ||

GYCT Designs


Thursday, August 28

Needle and Ted ||

Mae & K ||

Mimi’s Mom

Friday, August 29

Pienkel ||

Once Upon a Sewing Machine ||

Friends Stitched Together

Saturday, August 30

FABulous Home Sewn ||

Gray Skies ||

The Crazy Tailor

Sunday, August 31

Nine Stitches ||

Max California ||

Oliver’s Fancy ||

Friends Stitched Together

Monday, September 1

a happy stitch ||

lady and the gents ||

Our Family Four ||

Swoodson Says

Tuesday, September 2

verypurpleperson ||

Things for Boys ||

The Crazy Tailor

Wednesday, September 3

Our Family Four ||

Rebekah Sews ||

a happy stitch

Thursday, September 4

Sew a Straight Line ||

la inglesita ||

Made by Sara ||

Knot Sew Normal

Friday, September 5

Knot Sew Normal ||

Gracious Threads ||

Sofilantjes ||

Max California


Ruth’s First Birthday Bash! Review Time!

birthdaybash

Thank you all for joining me in Ruth’s First Birthday Bash!! I had so much fun celebrating with you all. A special thanks to all the amazing and talented designers that participated. I couldn’t have done it without you!!!

The giveaway ends August 31st so get your entries in now! Follow this link to a Rafflecopter giveaway!! I will announce the winner here on Monday afternoon/evening. We are currently enjoying Ruth’s birthday weekend camping. I am even going to let Ruth try her first s’more! I wonder how she will like it. Let’s take a quick look back over the year and the patterns that one lucky winner will receive as their own little birthday gift!

1month: Ladybug Bend’s Sassy Schoolgirl Top

RTC_1005

2months: Terra’s Treasures Monkey Pants 3 3months: Sewing Mama Raeanna’s Cupcake Top RTC_3162 4months: Titchy Threads Small Fry Skinny Jeans RTC_4167 5months: Everything Your Mama Made Riley’s Nightgown and Sleepshirt RTC_4612 6months: Little Kiwi’s Closet Bella’s BoleroRTC_7847 7months: Aila and Frankie’s Honeyflower Dress and Tunic RTC_8576 8months: FooFoo Threads Lucky Penny Girl’s Knit ruffle Top RTC_4693 9months: MuffinHead Pattern’s Sammy Jacket RTC_4637 10months: Jennuine Design’s LOL Swing Top RTC_7163 11months: Whimsy Couture’s Tulle Ruffle Dress RTC_8204 1year: Fairytale Pattern Design’s Arianna Dress RTC_0872 Now that you remember what all the patterns are, head on over a Rafflecopter giveaway and enter! Good luck!!


She’s SEW One!!!!

birthdaybash

She’s SEW One!!!! Well technically not until 9:16pm but who’s counting? Honestly this year has just flown by. I am trying to prepare myself for time just going faster. It’s inevitable so I hear. But for today, let’s get back to the subject at hand…Ruth! We have several people celebrating with us today too! I can’t wait to introduce you to a couple others that helped celebrate Ruth’s day. Are you dying to know who everyone is yet? Ok ok, let me tell you. We have Elizabeth from Fairytale Designs, Kelly from Green Jazz Face, and Kelly from Kelly’s Sweet Rewards!

RTC_0817

Before we talk the technical stuff I want to wish my baby girl a very happy first birthday! I can’t imagine my life without you. You were an unexpected gift that I cherish everyday. You fill mine, your brothers, your Grammy’s and everyone in your life days with smiles, smiles that light up an entire room. You love to know how things work and you are one who loves to analyze with a quizzical brow prior to trying things out. Your ease with life flows like a river that will one day cut its own path, even in rock, and lead you to wherever your heart desires. I look forward to continuing to watch you grow into a lively girl, young lady, and one day an independent woman. Your journey is just beginning. It will have its ups and downs like any journey does, but I promise I will be there to love, support, help and encourage you every step of the way. I love you my dear daughter!!

RTC_0932

RTC_0951

I couldn’t wait to do Ruth’s 1st birthday photoshoot. RTC_0882But first came the hard part…deciding what dress to make. I knew I wanted something fun yet princess like with a full bottom. I finally decided on the Arianna Dress by Fairytale Designs. RTC_0983When Elizabeth agreed to be a part of the giveaway too I was so excited to dive right in. This dress comes in sizes 0-3mo- 8yrs and even includes the doll size. It features a sweetheart neckline, slightly gathers straps, a scalloped circle overskirt, and circle underskirt. It buttons in the back but you don’t have to do any buttonholes on this one!! There are also four different hem finishes in the pattern. RTC_1012I choose the bias finish for mine. I just love the fact that this pattern has a circle skirt, especially the scalloped overskirt. Now for Ruth’s dress I left off the underskirt and instead put a no sew tutu underneath to give it a very full princess look. I just love it!!!!

RTC_0872

Did you notice that banner in the photos? It was custom made by Kelly at Green Jazz Face (or Wedding Banner Love as she is renaming her shop).RTC_1214 I found out about her shop a while back as a fellow photographer friend uses her banners all the time. I love how they added a special touch to the photos and knew one day I just had to get one for my photoshoots. This was the perfect occasion for one! Really any occasion is as she makes them for any and all occasions. These are very durable banners as they are made with chipboard and then mod podged for security. Ruth was playing with it at the end of the photoshoot and even though she waved it around and walked on it, she didn’t hurt it one bit. They really make a great addition to any photoshoot and are customizable! I foresee more in my future!!

banner

Of course no first birthday photoshoot is complete without a cake smash session.RTC_0858 Ruth’s cake came from Kelly’s Sweet Rewards. It is a delish bakery in the next town over from me that we frequent often and not for just buying sweet treats. Nope she hosts birthday parties, classes for kids and adults, and of course her amazing cakes and other sweet treats. She created an amazing little cake just for Ruth, sewing themed of course! RTC_0831Now I had visions of Ruth digging into her cake and getting those magical cake smash photos. I even made sure that she had cake several days before in order to make sure she liked it, which she did. However the cake smash didn’t quite go as planned. She loved the “spool” of thread on top. But then she touched the frosting…it apparently was squishy, made her dirty, and she just wasn’t having any of that!! RTC_1062After she calmed down I even tried again. Nope she still felt the same about it. She was not getting dirty. So much for my magical cake smash photos. This was reality instead. She loved the cake later (who wouldn’t? Seriously delicious!) when she could eat it with a fork. Well I learned one thing; Ruth doesn’t like getting dirty or frosting covered! Little Diva! LOL

Tryagain

Want to know how to get your hands on pattern, banner, or cake? You can head over to Etsy to buy either the Arianna Dress pattern by Fairytale Designs or your own banner from Green Jazz Face. As for a sweet treat from Kelly’s Sweet Rewards, if you are ever in CT head on over to the Danbury area to get some of the best tasting cakes ever!!! Thank you ladies for making Ruth’s first birthday photoshoot a great success which will give us lasting memories.

RTC_0891

Tomorrow will be the last day to enter to the giveaway for all 12 of the PDF patterns I featured in this series. Make sure you head on over to a Rafflecopter giveaway to enter to win. Tell your friends about it too!!!

RTC_1069

8/19: 1mo Ladybug Bend’s Sassy Schoolgirl Top

8/20: 2mo Terra’s Treasures Monkey Pants

8/21: 3mo Sewing Mama Raeanna’s Cupcake Top

8/22: 4mo Titchy Threads Small Fry Skinny Jeans

8/23: 5mo Everything Your Mama Made Riley’s Nightgown and sleepshirt

8/24: 6mo Little Kiwi’s Closet Bella’s Bolero

8/25: 7mo Aila and Frankie’s Honeyflower Dress and Tunic

8/26: 8mo FooFoo Thread’s Lucky Penny Girl’s Knit ruffle Top

8/27: 9mo MuffinHead Pattern’s Sammy Jacket

8/28: 10mo Jennuine Design’s LOL Swing Top

8/29: 11mo Whimsy Couture’s Tulle Ruffle Dress

8/30: 1year! Fairytale Pattern Design’s Arianna Dress

one